Thursday, September 29, 2011

Mas Bags - Studio Shots

As I may have mentioned once or twice, I really like making stuff. I may have also mentioned that I like to sell the stuff I make on my Etsy shop. I also enjoy writing about the stuff I make and sharing photos with you. And, truth be told, I find the whole process to be pure pleasure and good clean fun. But the photography thing? That can sometimes be a pain in the butt. Here's why:
1) I am not a professional photographer. 
2) Though I have a fairly nice camera, let's not assume that I know how to use it.
3) Finding someone to model stuff so you can take a photo can be sort of hard to arrange, and I HATE to inconvenience people or put them out.
4) Shooting during the day can be awfully hard when you work during all daylight hours (except a few at the beginning of the day, which don't count).
5) This leaves shooting on the weekends, which only happens once a week.
6) Since I oftentimes don't want to annoy people by asking them to model (see #3), I wind up modeling myself, which (unless Robb is around and is game to help) involves me standing on the street setting a timer over and over and over until I get it right. Embarrassing! But true.

That said, I made a discovery this week: the studio environment!
I had actually never really thought about it until a coworker mentioned it a couple of weeks ago, but we have a light room at our work that is perfect for taking still life photos. I've been in this room hundreds of times to check proofs over the years. It's basically an all-white really brightly lit room, and the idea is that it creates the most vivid version of sunlight that you can get indoors. Over the years, that room has illuminated many things for me on the book proofs, such as off-color sweaters, twisted bra straps on models, and many many a blotchy complexion. Once I even found stubble on a male model's chest! All of these "imperfections" get circled with a Sharpie and sent off to the printer with a note that says "smooth" or "remove."
But I had never realized that it is also a room where our graphic design department occasionally shoots still lifes for books. And so one day this week, I stayed late at work and brought in a few of my newest HeyAllday Handmade Modern Carpet Bags and a camera. Lo and behold, they were right! It IS fun and easy to shoot in a studio. It was dark outside but light in that studio, and I was in and out of there in ten minutes, thereby effectively solving all of problems 1-6 listed above.
I think the biggest surprise of shooting in a studio setting was that it can be as neat or as messy as you want. I had thought that shooting in a studio would make the bags look super sterile, but with my sort of "styling" (which is to say artfully sloppy), they retained the HeyAllday Handmade spirit.

And of course, since I know you're all wondering, each one of the bags shown here is now up in my Etsy shop. You can see more of the studio shots there, plus a shot of each of the bags on a street scene with me, because old habits die hard. And yes, those ones were shot with that same old nerdy timer. Oh, the things we do for our craft...

Thursday, September 22, 2011

Things I Learned From Bust

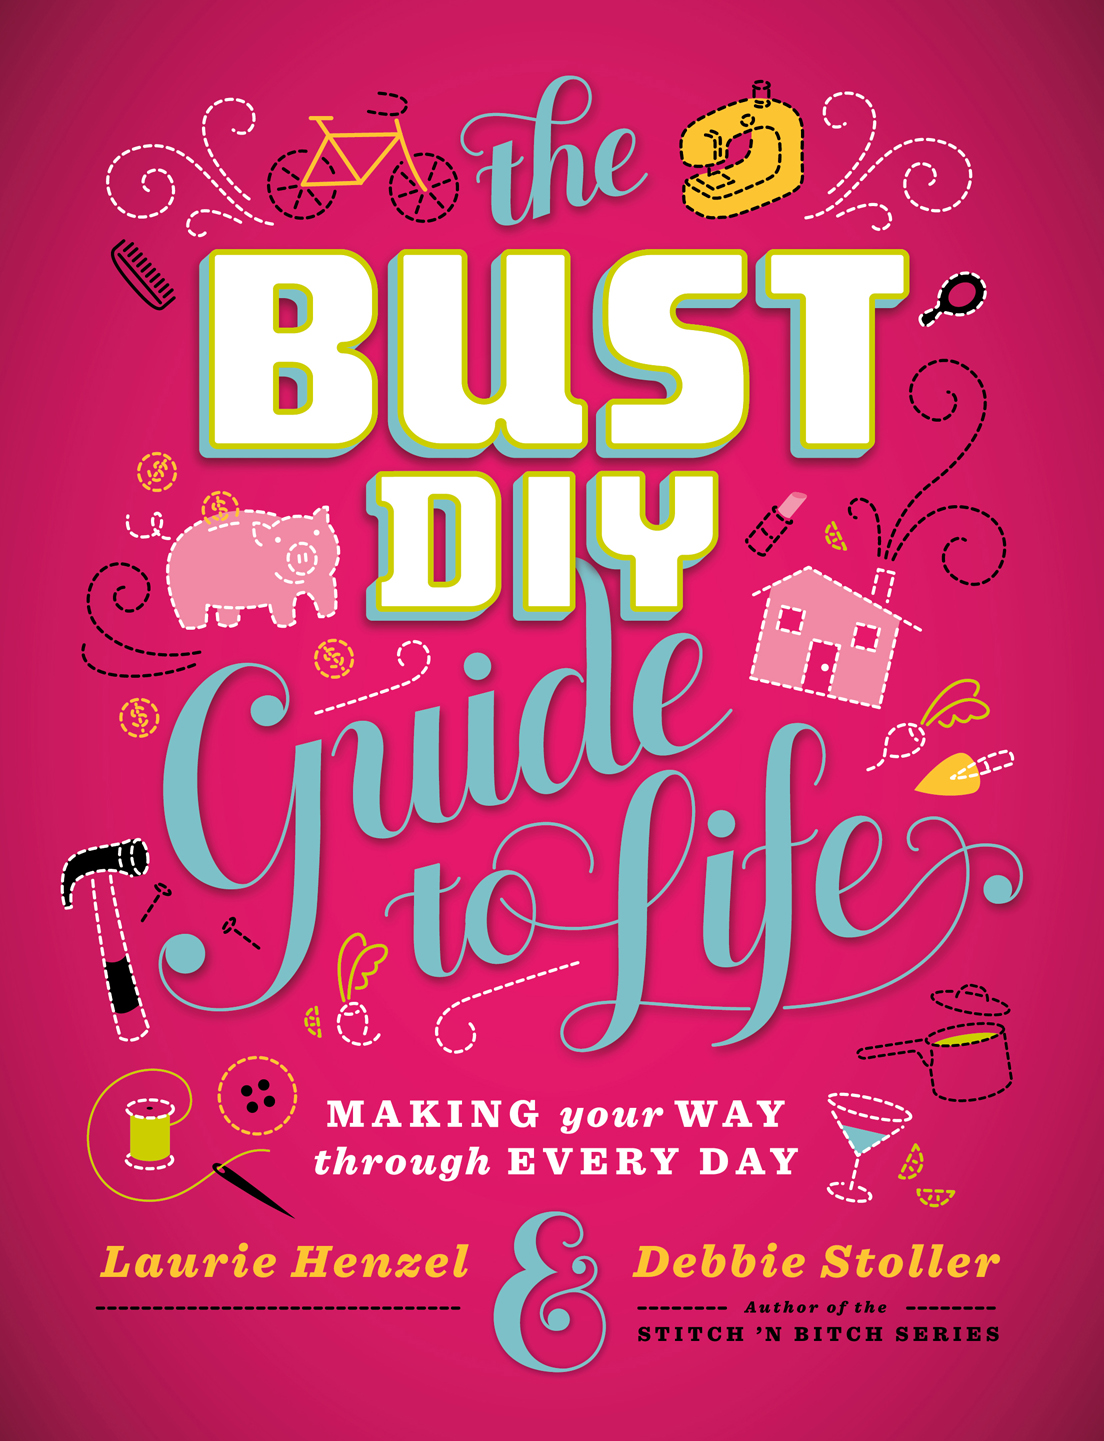
If you know me well, then it's quite likely that you know I edited a book recently called The BUST DIY Guide to Life. And while this book is a compendium of all of the DIY articles published by Bust Magazine over the last 15 years--more than 250 of them, to be exact--there came a point in working on it when it started to feel like my own. Not in a creepy Hand That Rocks the Cradle "I'm gonna steal the baby" kind of way. More like, I found myself personally involved in the victories and challenges, the daily struggles and even the curating, than I had ever found myself on other books. For instance, I'm the one who insisted we move things around at the 11th hour so that we could include the "how to make pinatas" entry. True story! I also remember mourning the loss of the DIY Dream Catchers when we had to cut it. Those were kind of cool. But the book was coming in 150 pages too long, so a few things just had to go. (RIP Dream Catchers.)
 
One of the most hilarious (in retrospect) ways in which I became intimately involved in the book was when I found myself one night sewing projects for the photo shoot. We had picked about 25 projects from the book to remake and have them re-shot by the fabulous Marianne Rafter. Things were going well...we had sewers and crafters all over town making the items. And then, all of a sudden, the girl who was sewing several of the projects told us that her sewing machine broke. And she couldn't fix it. And she couldn't finish the job. And oh man...that was a stressful moment...you can't have a photo shoot if there's nothing there to shoot! We got on the phone with every expert sewer we knew that night and thankfully managed to find someone two days later who could finish the job. But that night, just to make myself feel better, I took home three of the easier projects and made them myself. And so, you can see my handiwork in the book in the form of the image-transfer dog pillow above. 
 
And this scarf made from cut-up felted sweaters.
And this skirt!

I am also in a photo in the book, though I don't think anyone knows it. I'm sort of in the shadows of this one shot, and it was taken at the very end of the day when I was tired and my hair was up in this messy bun, and somehow I look sort of like a man. So if you see a man in the shadows in this book, it's probably me.
Though there were many lessons I learned while working on this book, I won't share them all with you here. Because that would be boring. (It's mostly, like, editorial stuff.) But I will share with you one cool thing that Debbie Stoller taught me, because it is awesome. If you are ever reading a sewing pattern and can't quite visualize the instructions, get out some napkins or some scrap fabric or rags, mark one side "right side" and the other "wrong side" and follow the instructions, stapling instead of sewing.

This is how we wound up figuring out the instructions for a laptop cozy pattern that I could not understand for the life of me. Debbie and I must have exchanged 14 emails debating how to construct this cozy. You see, when things have linings, it gets really confusing. I think it's because the "right side" of the lining fabric goes on the inside of the pouch and then your brain explodes. So Debbie called me up and said, ok, grab a napkin and a stapler. We're gonna do this together. And on the phone, we each made the cozy. My napkin kept ripping when I went to turn the lining out, so I grabbed some fabric I had laying around and stapled away.
And now I use my practice cozy as a drink coaster at my desk. And as a reminder of how awesome it is to learn a new trick from a crafty guru like Debbie Stoller!
All of that being said, the book officially comes out on October 1 (though you can order it now on Amazon and I believe orders are shipping!) and I am so so so so so so excited. Instead of going on and on about how you should buy it and how you're totally going to love it and all of that, I'm just going to give you a list of some of my favorite articles in the book--like, projects that I have either already made or that I am planning to make--and let that speak for itself:

Spicerack made from an old suitcase
DIY decals for mugs
Getting rid of wine stains
Building a raised garden bed
Terrarium building
Growing potatoes in a bucket (done this!)
Fixing your bra when the underwire pokes through
Turning an old t-shirt into cute underpants and a tank top
Tie-dyeing your tights
Hat making
Fabric flowers for your hair (done this!)
Friendship bracelets
All of the DIY hair-dos (bouffant, beehive, Frida Khalo, to name a few)
DIY hair highlights (done this!)
Homemade sugar scrub (done this!)
How to light a charcoal grill
How to make a pinata (done this!)
How to make candy corn from scratch!!
How to make butter from scratch!!
How to forage for maple syrup!!!
How to buy a house
How to stop hating running (tried this!)
What to do if you get sick and you don't have health insurance
How to start your own craft business (done this!)
How to camp
How to get married (done this!)
How to fix your bike

And THAT is only 8% of the book. Just saying. It's a whole lot of book.

Which leads me to my final point, and that is this: I have never worked on a book where I've learned so much about life and wanted to make so many of the projects when it's all said and done. The 13-year-old Liana who was reading Sassy magazine and learning how to pluck her eyebrows and dye her hair with henna would be very proud to know that the 30-something-year-old Liana would be so deeply involved in making a book like this down the road. And that's pretty cool.

Tuesday, September 20, 2011

Baby Sweaters and Bears

Much to Robb's dismay, I decided to embark on making a baby sweater for a friend a few weeks ago. You see, Robb's sad that I haven't finished his man sweater (and truth be told, I'm sad I haven't finished it either!) I did that thing where you can't decide how you want to work a section--should I give it side seams or just work it back and forth? But isn't it a tad feminine to not have seams? Doesn't a big burly man sweater need big burly seams? And so, even though I'm working his cardigan top-down and seamless knitting is the big perk of that construction, I stalled beneath the armpits for months, not sure what do do.

Alas, I have decided on a seaming route, and now I am back on track! But first, I had this cute little baby sweater to make. It's the Easy Baby Cardigan from More Last-Minute Knitted Gifts, and it's in the 4-to-6 hour gift chapter, which translates to one bad TBS movie starring Salma Hayek, two episodes of Antiques Roadshow, and approximately four episodes of Pawn Stars (yup, my TV viewing choices = nerd alert.)

But this sweater isn't just for any baby! It's for my lovely coworker Natalie's baby. And guess what? This child is going to be born into Pickle Royalty! (She's married to Bob McClure of McClure's Pickles, which I will always think is the coolest thing. Think about it! Free delicious pickles for life!)
Right after I finished sewing the buttons on this sweater, I found myself thinking, hmm...this is really tiny. Are babies really this tiny? I decided that I simply had to trust my gauge and that author Joelle Hoverson and tech editor Sue McCain know how to size a pattern (which believe me, they do.) All the same, I felt the need to try it on something, just to see how it fit. Which is how my old, beloved teddy bear Smokey wound up wearing the sweater. Of course, I had the curtains wide open so I could get good light for the photo, and this happened to be the exact moment that our upstairs neighbor walked outside to take out his recycling. And since we're on the first floor, well, he got a nice, good look at me--the 33-year old woman holding a bear in a sweater with a camera around her neck. I bet that didn't look too creepy.

Anywho, the point of the matter is this: knitting something for an amazingly lovely person who is about to give birth to what will surely be an amazingly lovely baby is a really good feeling. Especially if you knit it in machine-washable merino yarn.

And now that I'm done, I'm ready to commit to Robb's man sweater! I think I need to set myself a goal...can I have it finished by the end of October? That's a lot of bad movies I'd need to watch between now and then, but oh, it would look awfully good in a pumpkin patch...

Wednesday, September 14, 2011

Modern Carpet Bags

So I have a new thing: carpet bags. As in, I've just started making them for my HeyAllday Handmade Etsy shop. And I am totally in-love/addicted/not-turning-back/making-them-like-a-madwoman. 

Funny enough, the idea to start making autumn-inspired carpet bags started right after I got back from Hawaii. The tan was still fresh on my skin and the temperature outside was perfectly summery, but the season had definitely changed in my head. I guess part of me started thinking about those chilly months to come. And that brown corduroy jacket that got stolen from a bar last March (it was only my FAVORITE jacket, jerk-face who stole it). And I was also thinking about how I made all of these shopping bags in bright springy colors for the In God We Trust Bazaar last December, and how I looked around the room at the other vendors--who were selling hats and mittens, cozy coats, and holiday hair decorations--and thinking, oops...might I be off by a season?
And so, inspired by some vintage upholstery fabric I stumbled upon and a desire to get it right this fall, I started cutting. I made a nice rounded bubble shape, then cut out a pretty contrasting lining fabric in the same shape (see the fun geometric lining fabric below!). Then I sewed them up, made some nice long straps out of heavy-duty gray fabric, and before I knew it, I had this great vintage-inspired but not-too-old-timey bag--super strong and sturdy, and big enough for all of your nerdy books, earnest journals, Sharpie markers, reusable coffee cups, and the other clunky things that ladies like to tote around.
I, of course, immediately wanted the first bag for myself. (This always happens when I make things to sell...I want them all! But I can't have them all! And I certainly don't need them all! But how do I choose a favorite?) And it's for this reason that I haven't put the bag below up on my Etsy shop. I have effectively rationalized this decision because it's the prototype bag, and the raw edges of the lining aren't hidden, and so who would want this bag anyway, right? But secretly, I just sort of kind of fell in love with it and am having a very hard time uploading those photos to Etsy.
 But this one...this here sweet little burgundy bag below...I have decided that it's ready for the big time. And so you will find it up on my Etsy Shop--the first of the HeyAllday Handmade Fall 11 Bags! Expect A LOT more to come. I've already made two others that are a smaller purse-size with vintage gold fabric. Again, I must repeat, I'm sort of smitten. I can't wait to take some photos and share!

Monday, September 5, 2011

Hawaiian Flowers

At the last In God We Trust Backyard Bazaar, I went into crafty overdrive and did that thing you're never supposed to do when you're in over your head: I pulled out the glue gun. "In addition to these twenty bags, I'm going to make one million fabric hair flowers!" I declared in a frenzy approximately 24 hours before the bazaar was set to begin. And so I grabbed a bunch of fabric scraps, ran a thread through them to create a pucker, then rolled them into floral shapes of all sizes, from real real big to teensy eensy.  And then I hot glued those suckers onto hair clips and headbands. The response was met with varying degrees of enthusiasm. Many of my friends looked at those giant fabric flowers and simply said, "No, I can't. Not me. Nope." And others grabbed two at a time and wore mismatched prints together (love!). Bottom line was this: Brooklyn was perhaps not entirely ready for the giant fabric flowers.

But Hawaii? Oh yeah. They're ready.
I spent last week in Kona on the Big Island of Hawaii, and on our second day there, we got to watch some hula dancers do a demonstration. Other than the fact that the ukulele has a slight narcotic effect on me (it's so calming! I suddenly feel so euphoric!), what really grabbed my attention were the size of those dang flowers they put on their heads. Bigger is certainly better in the great state of Hawaii! These girls above were not afraid to mix shiny royal blue with an entire hot pink head bouquet.
And this lovely lady above said who needs long hair when your entire head is covered in orchids?
Even the dudes wear giant flowers in their hair! Whilst playing with fiery torches, no less! (Mahalo, bra.)
Sara, one of our lovely friends we were traveling with, was just as enthusiastic about the flower situation as I was. It started out small, both of us just grabbing tiny little buds here and there to put in our hair. 
By day four, we had graduated to the big time. Here Sara wears her big fuchsia lei along with a giant yellow orchid that she picked right off of a plant in the garden outside our condo. Aloha, Sara!
Because I suspected we would be heading into giant flower territory, I came to Hawaii prepared, packing an assortment of fabric flowers from that last craft bazaar. I thought, hmmm...maybe I'll wear one to dinner one night. But before I knew it, I was wearing them everywhere! I wore one when we visited the lava flow above.
I even wore one in the hot tub! And it matched my bikini!!!
And then things got slightly out of hand. In this one, I believe I'm wearing five flowers picked from trees, a fabric flower headband, and possibly some sort of tropical onion behind one ear. 

Clearly I had gone too far.
And so, by the end of the trip, Robb reeled me back in. As we sipped our farewell pina colada at the pool bar, he picked this flower for me and tucked it in my hair. Simple, fragrant, and huge. Sigh...it really was wonderful indulging in my flowery hair tendencies. And though Brooklyn may not be entirely ready for head decor of this magnitude, I'm afraid Brooklyn will have to indulge me from time to time...or else I'm just going to have to pack up and move to Hawaii. Which, to be honest, does not sound bad to me at all.

In the meantime, if you would like to make a fabric hair flower of your own, here's how:
Grab a length of fabric--lightweight cotton or a silky handkerchief both make excellent flowers--and cut it to about 20 inches long and 4 inches wide. Fold it in half the long way with right sides together and sew a loose hem (either by hand or on a sewing machine) 1/2" from the raw edge. Turn the tube inside out so the fabric is right side out and pull the thread tails on either end of the hem to make the fabric scrunch up. Don't make it scrunch up too much...it should be about 12 - 15 inches long after scrunching. Start rolling the hem up tight, letting the fabric bloom out into a flower. When it's reached a nice shape, thread your tails through a hand-sewing needle and stitch through the base of the flower a whole bunch of times until it's secure. When you like the way it looks, hot glue the base of the flower to a hair clip or a headband or anything you fancy. Wear brazenly, and expect attention.

Monday, August 22, 2011

New York, End of Summer

Here's something I love about New York. One day, on the familiar street that you walk down every other day to get to the farmer's market, this dress arrives on a fire escape. It's this perfect corally pinky red, and you can tell even from five floors down that it's a little too long to be practical for a normal night on the town, so you come up with a story in your head about the person who is airing it out in order to wear it to a party that night--it could just as easily be a jokey costume party as it could be a gala event--and you feel lucky that you were able to catch that moment when it hung outside on the fire escape, against the brown sooty bricks and the wrought iron. 

And then the following week, as you walk to the farmer's market, you look up wistfully to re-live that moment when you saw the perfect corally pinky red dress, only...it's still there. And you begin to realize, it just lives there now. Through last weekend's torrential rainstorm, through exhaust from traffic racing by below, the dress still hangs, and no one's bringing it in any time soon. Why, exactly? Who knows!

That is, literally, my way of describing the kind of things that happen in New York.
And not that we don't love us some New York, but Robb and I are going to take a little vacation. To Hawaii in fact! So far away. So completely different from our normal lives. Right? I just can't imagine I'll find any vintage dresses hanging against sooty brick buildings in Kona.

Last week, it dawned on us that when we return from our trip, it will pretty much be September. Which is, incidentally, pretty much fall. And with chagrin we realized we hadn't had a single picnic in the park all summer. So we made a big dinner and walked it over to the park with a bottle of bubbly. The old man neighbor who sits outside every single night during the summer made his compulsory joke--"Dinner for me? You shouldn't have!"--as we smiled and laughed and kept walking with salad bowl in hand. As we set up picnic, I took this photo of Robb, above, which is quite possibly the cutest photo of him I've ever seen in my life. 
And then he took this photo of me. (Nice one, I know.)
After I practiced my Ariel-from-Footloose impersonation ("Daddy hates it when I wear these boots"), we watched the sky get dark and the lights come on and we became amateur sociologists, watching the neighborhood children play.
See these two kids in the background in the photo above? They were playing with a little girl and each of them had a stick, and then they took the girl's stick away and told her to GO AWAY and she did this sort of sulky wandering/stomping by herself thing for awhile as the boys continued to stick fight--one with TWO sticks, the other with one--until they broke the extra stick. I swear to you, I hated those boys! So mean!!!
All at once, it seemed, the sky became tinged with purple and the branches slowly swayed.
And sometime while we were talking about what a cicada actually is--what do they look like? Are they big and fat like a grub? Or brittle like a grasshopper? And why are they making that noise??--it started to get dark.
And then, as we were laying back, pointing out stars as they appeared in the sky, it got really really dark. 

And then we went and got some ice cream.

And this, my friends, is what New York looks like at the end of summer. I hope your end-of-August is full of similar scrambles to soak it all in.

To find out what Hawaii looks like at the end of summer, you'll have to tune in next week. For now? Aloha!

Tuesday, August 16, 2011

DIY Wrapping Paper

I just want to clarify that it's not like I HATE wrapping paper. I just don't tend to use it...at least not the stuff that comes on rolls.

Oh, except at Christmas when Robb and I pack all of our gifts into our suitcases and fly to his parent's house or my parent's house, and then we do the mad scramble the night before Christmas to wrap it all up using whatever shiny reindeer paper and sticky bows we can find. On that occasion, yes, I definitely use wrapping paper.

All other occasions? Eh...I just don't. Not really sure why! There are so many pretty boutique wrapping papers available (though often with a high price). And I'm a total snob about gift bags (especially if there is no tissue in the bag). Aren't I the worst?
But I DO love the magic of a wrapped gift. The mystery of it all. The bequeathing of the gift! With a pretty bow on top! And perhaps I've seen The Sound of Music a few too many times, but the one type of paper I tend to keep around the house for wrapping (other than using "creative" sections from the newspaper) is a roll of kraft paper. In a pinch, it can by gussied up with some braided yarn or a pretty ribbon I've hung on to for some reason (I call that kind of hoarding my inner "depression-era grandma").

But sometimes I want to kick up my brown-paper packages wrapped up with string, and in those cases I get out the stamps. I know, this isn't terribly groundbreaking news--stamps on kraft paper make things pretty. But it's true! And actually, it's really really easy. And in the girliest of ways, it really seems to delight the recipient. So in my opinion--even though they're just gonna rip and throw out the paper the second they open it--it's totally worth it.

For this particular gift, I did a repeating flower design in cream and green, and then I tied it up with two straps that I had leftover from a Heyallday Handmade bag (they were too short, so off they went!). And whamo, that's how you use the things laying around your house to wrap up a sweet little gift. 

And yes, I am totally a depression-era grandma hoarder who uses her "saved scraps" to wrap gifts.

So, any guesses as to what's in the package?