Tuesday, March 27, 2012

España Bound

The first time I traveled to Europe, when I was 19 years old, I remember having an irrational fear of gypsies. It's those guide books, I tell you! They devote whole chapters to the art of gypsy pickpocketing, which consequently makes young American girls feel as though, if they don't have a money belt slipped down between their underpants and their low-rise jeans, they'll find themselves penniless and passport-less in a train depot in middle-of-nowhere Tuscany. On the train from Paris to Rome, I remember waking up in our sleeper car throughout the night, and each time I woke up I was dreaming of gypsies.

Flash forward 15 years and I am still finding myself scared of gypsies! This time I blame Rick Steves, who wrote my current guide to paranoia in Spain. (Did you know that there are gypsies who will ride by your car on a scooter and reach in through your open window to steal your bag while you're stopped at an intersection? Thanks a lot, Rick Steves! Is nowhere safe??)

To that end, as I have been preparing for this trip to Spain, which I am about to embark on in just a few short hours, I have spent many an hour looking for the perfect pickpocket-proof bag. And when none of the bags in the shops met my qualifications, I decided I had to make my own. It needed to cross over my chest (no purse-snatchers for me!) and have a zipper, of course. And it needed to be made from a lightweight material so at the end of the day I don't feel like I've been carrying bricks. And it needed to feel happy--but not too happy--so I chose this tribal print for the outside of the bag, and a happy yellow for the inside.
I must say, I was very pleased with my zipper work! Actually, I have a confession to make: I had never installed a zipper before this one. And an even bigger confession: Before installing the zipper, I consulted my Reader's Digest Sewing Book--the be-all-end-all of sewing technique guides--and the diagrams and whatnot for how to install a zipper kind of gave me a headache, so I just sort of winged it. No idea if I did this right. But I like how the patterns on the panels line up on either side of the zipper, so that was cool!
But my vacation sewing didn't end with the bag. In a less paranoid sewing moment, I also decided I needed a new tunic, so I whipped up this little halter. Though I've never been to southern Spain, I do have a funny feeling that these colors and this print and the weave of the fabric is how it will feel. Close to Morocco, but not quite, and with floral swirls and punchy reds that have a sort of flamenco clickety-clack-with-a-rose-between-your-teeth kind of feel. But who knows if this is true...I'll let you know how it actually was when I'm back!
I tried to go out in the backyard to take a photo of myself wearing the tunic, but the dog was jumping around at my feet, and the light setting was all wrong, and then the upstairs neighbor in our apartment building opened the window and his little 5-year-old son said "Hi Wiana! Hi doggy!", and, well, that's hardly a time to continue taking glamour shots of yourself out in the backyard. But then I decided that blown-out photos can actually be quite kind, and so I share this little photo (note that I'm also wearing my gypsy-proof purse), with promises of more photos to come when we return. Adios for a bit, my friends. See you in April!

Tuesday, March 20, 2012

Goat Cheese & Honey Cheesecake

This pretty tart is NOT my cheesecake. But it's pretty!
Last week, I was talked into entering a company bake-off. And by talked into, I mean a coworker said, hey are you gonna enter the bake-off? And I said oh yeah, I forgot about that. Ok.

The truth of the matter is this: I was not so sure at all that entering the bake-off was such a good idea. As of late, I have simply had too much to do!! In just one week, Robb and I take off for a fun-filled 10 days (TEN DAYS) in sunny Spain. And for the last month and a half, I have been working my tail off to ensure that A) this vacation doesn't make me get woefully behind at work, B) I don't leave any unexpected messes on anyone's desk, and C) I won't think about work AT ALL while I am in Spain. And so, there have been some long hours. And there have been some nights where I woke up in a cold sweat, worried about, like, whether or not the project where you build a coffee table and grow plants inside of it is technically a terrarium or a miniature greenhouse, and if the latter, will all of the plants die if they don't have drainage?

What a silly thing to lose sleep over! But these, I'm afraid, are the things that haunt me.

And so, it was with some sort of foolish combination of energy and enthusiasm that I agreed to enter last week's company bake-off.

The contest was pie-themed! But unfortunately, pies are not really my forte. Because Robb wasn't around to make my pie crust (he is MUCH better at pie crusts than I am), and because no fruit, except like quince, is in season right now, I decided to make a cheesecake. A goat cheese and honey cheesecake, with a strawberry swirl on top.

This is my cheesecake! Sort of pretty.
I'll just cut to the chase right now. It didn't win. But think about it: when is cheesecake EVER the bake-off winner? (Stupid, stupid, stupid...always make chocolate! Always!)

Something else won. Something chocolatey.
I don't think this pie was the winner, but isn't it pretty?
Anywho, about my loser cheesecake. It was not cheap and it was not quick, but it was fabulously awesomely delicious. If you have about 4 hours and $35 to kill, follow these instructions as written and then proceed to devour it while sipping some sort of earthy red wine. Wear a Greek toga and golden underpants for extra fanciness. Super decadent, right?

If you have about 2 hours to kill and you're broke, might I recommend a modification? Cut all of the filling ingredients in half to make a short cheesecake, and just put it right in the fridge once it's cooled. It becomes almost more like a fancy frosted graham cracker cookie, and the richness of the goat-and-cream cheese and sweetness of the honey become a little less overwhelming. (Yes, I'm one of those people that is overwhelmed by cream cheese...and yes, I tend to scrape off half of the goop that comes on bagels...why do they think I need all that? So messy!)

Without further ado, I present to you the non-award-winning adaptation of...

Warren Brown's Honey and Raspberry (er...Strawberry) Cheesecake, from United Cakes of America

For the Graham Cracker Crust:
9 full graham crackers
3 tablespoons superfine sugar
3/4 stick unsalted butter, melted
1/8 tsp salt

For the Filling:
16 ounces cream cheese
16 ounces goat cheese
1/2 cup superfine sugar
1/2 cup honey
4 eggs
1/4 cup sour cream
1/4 cup heavy cream
2 teaspoons vanilla extract
1/4 cup strawberry puree (To make the strawberry puree, bring about a cup of sliced strawberries and a half cup of sugar to a boil. Cool down, blend in a food processor, and set aside.)

Preheat the over to 300 degrees. Grease a 9" x 3" round pan and line the bottom with parchment. (Note that I was too scared to use a spring-form pan--thought it might leak in the water bath!--so I used a shorter cake pan instead. But if you use a spring-form pan and succeed, let me know.)

Crush the graham crackers (a food processor helps) into fine crumbs and toss it with the rest of the crust ingredients. Press it firmly into the pan and bake for about 10 to 12 minutes. Set aside to cool and leave the oven on.

Put a roasting pan in the oven and fill it about 2/3 full with water.

In the bowl of a mixer, beat the cheeses on medium speed to soften them. Reduce the mixer to slow and add the sugar and honey in 2 additions each (about 3 minutes total). Add the eggs one at a time, allowing each to combine. Mix the sour cream, heavy cream, and vanilla together, then pour into the mixer slowly.

Pour the filling into the crust and drizzle about 1/4 cup of strawberry puree on top. Use your fingers to trace a swirly fancy design into the top.

Set the cake pan in the water bath and bake for about an hour. (The center of the cake should be slightly wobbly when you nudge it...that's the best I can describe it...sorry!)

Turn off the heat and leave the oven door ajar for 1 hour. Remove the pan from the water bath and let it cool for another 4 hours. Then put it in the fridge overnight.

Run a spatula around the edges to loosen it and plop it onto a plate for serving. Eat it!

(And if you're making the cheater version, bake it for the full hour so it really cooks through, but just pull it out of the oven and let it cool on the counter for a bit. Then eat it!)


Sunday, March 11, 2012

Meet Hot Lips (the Knitted T-Rex)

So I don't know if you all remember, because it was SO LONG AGO that I hardly remember, but do you recall when I decided that I was going to knit a dinosaur from the appropriately named book Knitted Dinosaurs? I actually went so far as to ask all of you which dinosaur you wanted me to make, and based on your votes (and the votes of your children and dogs), I decided to make the T-Rex!

Folks, this was so long ago that there were leaves on the trees, and they were turning pretty colors. Want proof? This is a photo I took from the window aboard the Amtrak train as I rode up to Rhinecliff to go to the Sheep and Wool Festival. See? Leaves!
And here is the dinosaur's tail, which I knitted on the train whilst sipping coffee. (Actually, looking back on this, I can't think of a more idyllic way to spend a Sunday morning...)
Not long after the Sheep and Wool Festival, I actually finished knitting all of the components that make up a knitted dinosaur. These include (clockwise from top): a body that, unstuffed, looks like a snake with a crocodile head, a mouth that turned out to be way too large, two tiny useless forearms, a couple of legs, a couple of of foot pads, and in the middle, a spiky ridge to run down the middle of his back.
Over the course of another week or so, I sewed the whole thing together, attaching this to that, stuffing each little limb, and weaving in all of the tails. I must say, sewing a dinosaur together is a bit less romantic than knitting him on a train while admiring fall foliage. But he came together really nicely (except for maybe that giant mouth.)

My roadblock came right before Thanksgiving, and it was so stupid I can't even stand it: I didn't have any felt for the teeth and the eyes. That was it. That was the ENTIRE roadblock. And so my poor dinosaur sat there fully assembled for months, with no eyes and no teeth. He was basically soulless.

Want to know how long it took me to fix this problem? FOUR MONTHS. God, that is so embarrassing. I know that I've been talking about this theme a lot recently, but why do I leave so many things right on the verge of completion? Here's what I'm thinking: This is the year that I attend a special month-long workshop held by, like, Oprah Winfrey, and my yoga teacher I loved so much in San Francisco, and maybe my mom, and possibly a life coach, and when I emerge from this workshop, I will be a person who actually completes things in a reasonable amount of time. Or, you know, doesn't start things until the other things are finished. Or, you know, become a perfect person.

Yup, totally gonna happen. I'll go call Oprah right now.

OK, my quest for perfection may be a bit unrealistic. What I should be focusing on is this: I finished the damn dinosaur. I had to walk seven blocks to buy the felt, and then it took one whole hour to cut out his felt teeth and eyes and sew them on. And now, I present to you: Hot Lips Houlihan the T-Rex!
So about that mouth...this is what I was talking about when I said it turned out a little, um, large. (I used a different yarn at a slightly smaller gauge and wow does that make a difference...well, now we know.) 
You'll notice, too, that his entire body is actually a little large--18 inches nose to tail! In fact, to show you just how large he is, I posed him next to a toy dinosaur that I've had for years and years. Not that this comparison will be helpful at all for anyone who hasn't seen the toy dinosaur before. OK, maybe I just wanted to take a picture of them together because I thought it was cute. So sue me!
For similar reasons of cuteness, I also decided to take pictures of Hot Lips eating the smaller T-Rex as he tries to run away.
And then they became friends.

Epilogue: After giving it some thought, I don't actually think that Robb and I need a stuffed dinosaur in our house. And so, pretty soon, he will be leaving his little buddy to go join a yet-to-be-born baby. (I can't tell you who yet. But if you are pregnant and you are a friend of mine, you might be in the running. But don't get your hopes up, because it might not be you.)

Let's hope that Hot Lips brings years of joy and fun to this little baby, and that his giant teeth and mouth don't scare the crap out of the child and scar him/her for life. Yay!

In the meantime, thank you, friends, for participating in the making of this dinosaur! I hope it was all well worth the wait.

Sunday, March 4, 2012

Cheater Scarf

This has probably been one of the dumbest winters ever (at least in this California girl's opinion.) One of the great perks of growing up on the West Coast and then moving to the East Coast is the magical appearance of this white fluffy thing we call snow. This year, however, I have seen none of it (except for on Halloween, which made no sense.) I have two pairs of Sorrel snow boots and nowhere to wear them, people! Instead, I've been bundled up like I'm in San Francisco--layers of dresses, sweaters, jackets, and light scarves. Even hats--my beloved hats!--are more of an optional accessory than a must-have line of defense. Crazy town, I tell you. 

From January until last night, I have been pretty much living in my purple/gray tie-dyed scarf. Truth be told, I AM STILL NOT SICK OF IT. Other people might be sick of looking at it, but not me. All the same, I got to thinking that I should maybe have one other scarf option to get me through the rest of this stupid winter. And so I decided to turn a crummy old short scarf into a ladylike cowl.
I'm not going to lie to you. This scarf came from the lost-and-found at the bar where Robb works. And no, it's not the first item of clothing I've worn that's been left behind by drunk people. Ever wonder where your favorite hoodie went after a murky night at the bar? The bartender's girlfriend is probably wearing it. 

This scarf was a little scratchy, a little synthetic, and the edges were raveling just a bit. Plus, it was way too short to be worn as a scarf--48 inches! Four measly feet!--and so it was literally good for nothing. But Robb brought it home, and I went ahead and washed it, and then it just sat there doing nothing. And I hate it when clothing items (or items in general) just sit there doing nothing. So last night, in what can only be called "a fit of clothing repairs" (seriously, I fixed ripped pajamas, tank-top straps, holes in sweaters...I was on a roll), I took some white yarn and sewed the edges of this scarf together. (For those who want to try this trick at home--even non-knitters--it's super easy and here are some tips. Though you can always hack it and sew the ends together any old way you like--the seam goes at the back of your neck, so it can be as Frankensteiny as you please.) 

Once the edges were sewn together, I could slip the thing over my head and wear it like a big loopy necklace (which provides zero warmth). Or I could wrap it around my neck twice, like shown above, which is an awesome cuddly way to keep your neck warm (plus it looks all fancy and twisted.)
And if the wind picks up and my ears get cold, I can lift up one of the loops and slide it over my head like a hood. It is surprisingly warm! And when I look at my reflection in car windows as I walk by, I feel feel very glamorous, and maybe just a little bit "old Hollywood insane."

Of course, you could also go ahead and knit yourself a simple little scarf and sew the ends together, but my thinking is this: we only have one more month of this silly little winter to endure, so rather than spending that month knitting the scarf, why not grab some old ugly thing and turn it into something a little fresh and useful, something to give your purple tie-dyed scarf (or your equivalent of a purple tie-dyed scarf) a time out. And then before you know it, it will be spring, my friends! Spring!

Wednesday, February 29, 2012

My First Books

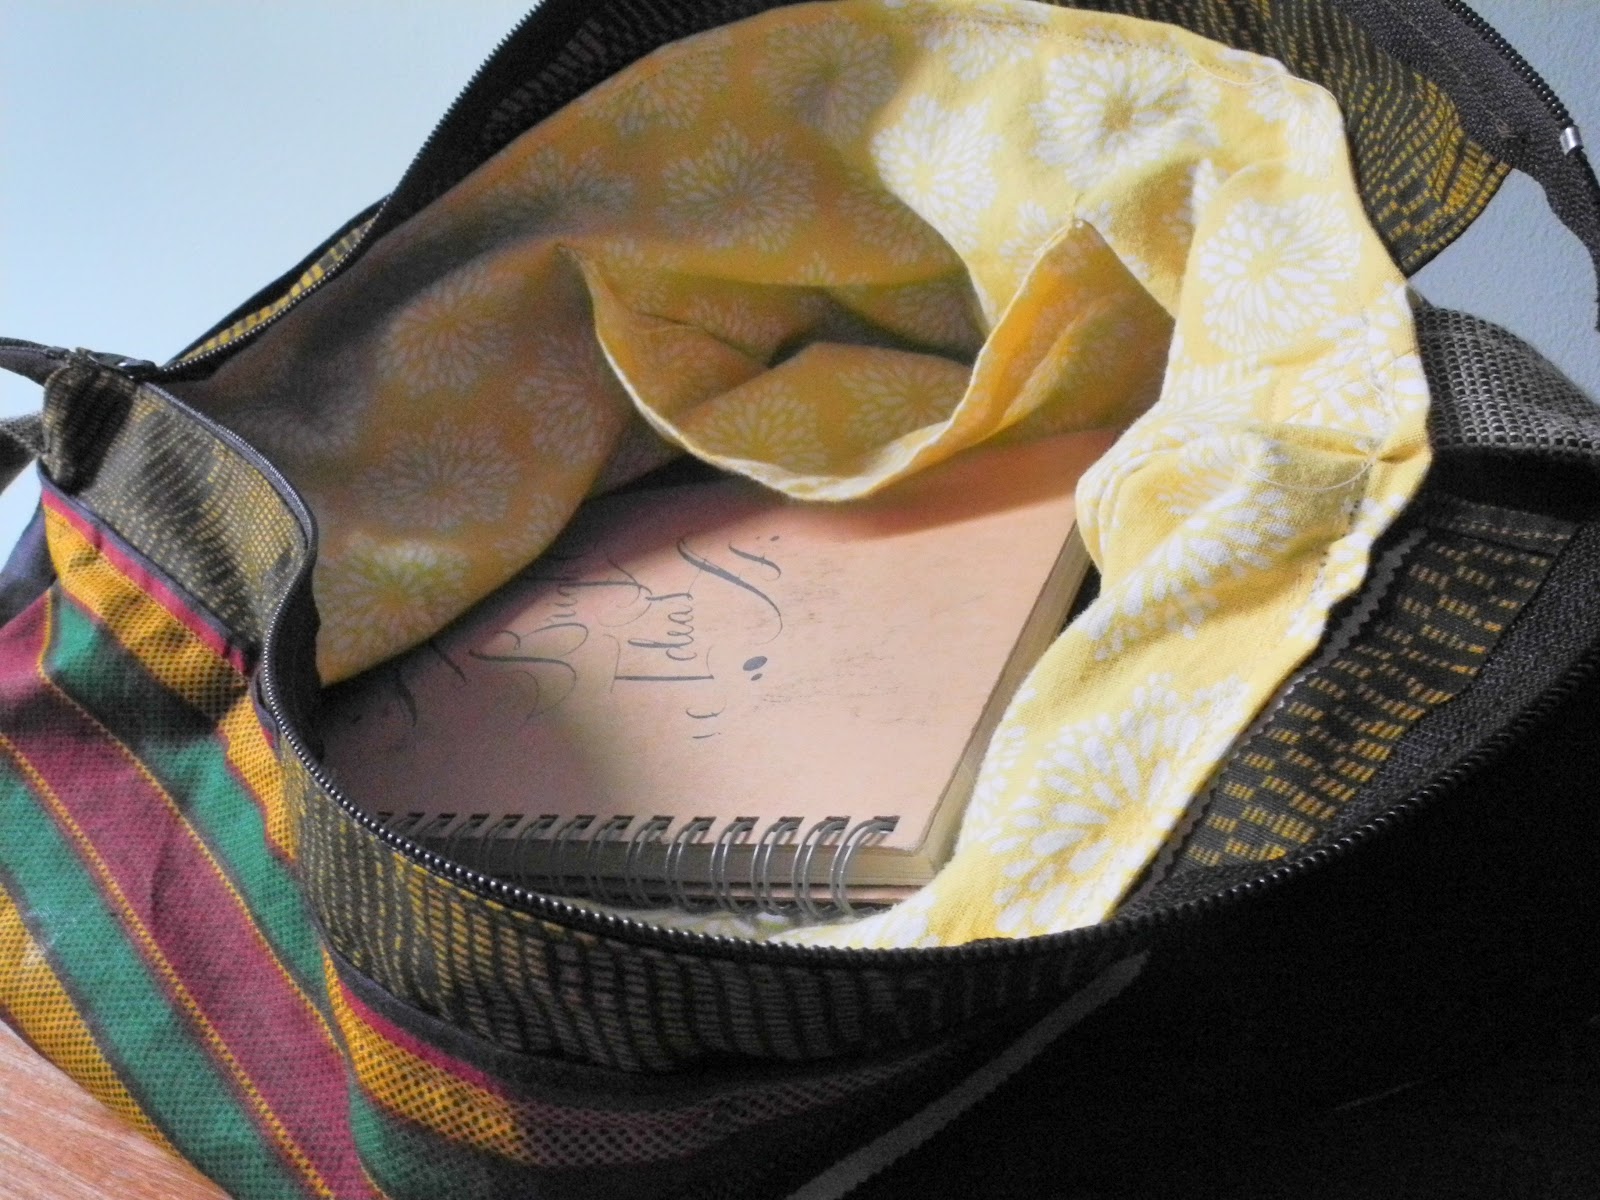
When I was younger, I do believe that I had less shame. Not that I can feel myself drowning in any shame-mires now, but I really didn't have any shame 15 years ago. I used to write from a place that was exceedingly indulgent, and--I think, anyway--surprisingly truthful for my age. And then I would type up my favorite entries from journals, bind them into little booklets, and give them out to friends and family at Christmas.

It's a little cringe-worthy now, to read through these books. I shared everything. Reports of drunken nights and make-out sessions, sappy feelings and attempts at rage. I recall my aunt asking me one Christmas morning, did you have to use the F-word on the very first page? And you know what, I did.

To me, being a true writer meant telling the story, regardless of who was going to read it, even (and especially) if it was embarrassing. I didn't base my picks for each booklet on what was most presentable to the greatest number of people. I picked the stories and journal entries and poems I thought were best. And then I just held my breath and handed them out. It always surprised me to learn that people actually read them. I'm still convinced that the booklets were read in a gossipy way, so people could see if they "appeared" in an entry. Or to guess who it was I was dreaming about.

When I was about 24, I stopped writing for a while. I must say, I don't think this was necessarily the right choice, but I don't think it was the wrong choice either. The reason I stopped writing is because I felt like all of my topics were drivel. Half-baked. Youthful, but in a whiny way. Undeveloped. One-dimensional (one-and-a-half dimensional on a good day.) How many times can one write about smoking a cigarette on a rooftop in San Francisco? And so I stopped until I was 28, and the booklets stopped with them. It's sad, really. I guess you could say that I crushed my own spirit. Or at least, I gave myself a mandate: grow up, and then let's see what you have to say. Ruin your life; it's the gateway to the other dimensions. Just be quiet for a bit; trust that you'll still be in there when you're ready.

But oh, I'm so glad I have this record of younger times. It's funny, my syntax has stayed much the same. All of these years, and I'm still breathing the words the same way. (Isn't the placement of a comma just like taking a breath? In my opinion, where you choose to put a comma is optional, and depends entirely on how you breathe.)

Of course, there are entries throughout that are utterly embarrassing. Lousy metaphors, over-worked analogies, and sometimes no sense of irony whatsoever. There's even one dreadful story in the first volume called "Beanstalk, Jack Beanstalk," with instructions to be read in a subtle Brooklyn accent. (Ugh!)

Icy Fingers, Mistaken Embraces (what a terrible title) was the first of the group. It was 1996 and I was 19 years old--my first year of college. My English teacher had the class end the semester by compiling what she called a "chapbook"--a collection of work we had written (hence the terrible Beanstalk story). OK, there is nothing redeemable about this collection except the cover art--my friend Dave Mason drew this picture of me in all of ten minutes out in the quad of Moorpark College, and to this day, I am in awe of what he was able to sketch so quickly. It is, literally, the only piece of talent that came from this booklet.

But! Icy Fingers Mistaken Embraces gave me the idea to do more booklets, this time using stories and journal entries I actually cared about.
Duomo Circus came next--named, of course, after the slip of paper that a very good-looking man in Florence gave to me that read "Do you can came with me tomorrow in Duomo Circus for a drink." 1997 was my first real year of traveling ever in my life. I went on a 3-week trip to Europe with my girlfriends--a trip that to this day is probably one of the most epic adventures of my life--and I also visited New York City for the first time and fell in love with it. And so this booklet contained all of my journal entries from my travels, opening with a favorite Jack Kerouac quote and an earnest declaration that I would go to Europe "without a boyfriend, without a husband, carrying only my youth and a promise..." (hee hee...so dramatic!) And of course, wouldn't you know, I only have one coffee-stained copy leftover of this one.
100 Degrees Below 100 came next (1998)...
...Followed by Molly's Soliloquy (1999). This one, I think, was my favorite. All of that yummy English major reading I was doing in college--Ulysses and Paradise Lost and Salman Rushdie--it all soaked in and came through here. When I think of myself writing, I think of this year. The poemy thing I wrote called The Odyssey (above) was one of my favorites.
The last one I wrote was El Elegante. I was 23 years old and obsessed with Anais Nin. I had just moved to San Francisco. The World Trade Center had just been destroyed. I guess you could say that change was in the air. It's funny, though, that this was the end of the road for the booklets...to suddenly stop doing something that had become such a ritual. And I had just switched over to color-printing technology!
In the spirit of considering change, I particularly liked this entry called Teething, which I wrote on the eve of my 21st birthday. And in the spirit of considering change, perhaps this is the year that I make my next booklet. I've followed my own rules, after all, and have grown older, so (as you know), I am giving myself permission to write again. I'm curious to see what my grown-up booklet would look like, what I would have to say. And, of course, how I would feel about it 15 years from now.

Teething

Seems strange and altogether stupid to mourn a year when another day will greet you just like any other. My last hour, and I am so melodramatic.

But tonight I drove home and realized that fifteen was six years ago and I cried and cried because that was when I met Matt and Chad, and that was when youth seemed eternal and then one day you hear Matt's getting married in June and that seems far away to him. So nonchalant. And they will get married and there's no reason why they shouldn't.

Late bloomer. I will not marry for a while because I am not mature enough to want that kind of life.

Late bloomer. I was not ready to move out until now, and even now I feel a pang seeing mail show up at this address.

Late bloomer.  I thought my sunflower on the kitchen table was a late bloomer, but it only closed up and died. Not I.

Late bloomer, that may not publish a novel or a story till far past twenty-one. But that is all right. Like many women before me, that is all right. Like my sisters who bite their tongues until they have no more, until evolution just started making women without them. But I believe in regeneration. Like sharks teeth, my words will grow out of my experience and nights like tonight, crying on the 405 because I became an adult in one day. I should have seen it coming. I had it on the calendar. It is a simple math equation--every 365 days.

But I don't quite fit this suit yet and I wonder if sharks cry when they teethe.

10/8/98

Wednesday, February 22, 2012

Quilt of Burning Love

What can I say? It was the weekend before Valentine's Day. I had been detoxing all week--no cheese, no wine, nothing!--and I had all of this what can only be called energy. And so it made perfect sense that it was the weekend to start making what I now refer to as The Quilt of Burning Love. That whole weekend, I really went on a tear. Not only did I reorganize the junk drawer, but Robb and I cleaned out all of our drawers, getting rid of bags and bags of old clothes. We order seeds from the seed catalog and did all sorts of barfy couply stuff. And while digging through our laundry closet preparing to go to the laundromat, I remembered an old backpack I had stuffed away in there. And in this backpack was a very large piece of patchworked fabric that I had always meant to do something with. And so, since I was on a tear, I fished out the fabric and tossed it in with the rest of the laundry, deciding that I would turn it into a quilt.

The patchworked piece of fabric, you might be interested to know, was once a room divider between the "living room" and the "bedroom" in my last apartment (which, let's just say, had a rather open floorplan.) It was one of the first things that I sewed when I got back into sewing a few years ago, and it was hastily put together in an emergency situation while preparing for a family visit. I had just moved in two weeks prior to their visit, and somehow, when the realtor had shown me the apartment, I had completely forgotten to look at the bathroom. Friends, it was TINY. Like, you could sit on the toilet, brushing your teeth, and then ever so slightly bend over and spit directly into the sink. If you wanted to change your clothes in the bathroom, you had to get INTO the shower, which was only three feet long. 

This bathroom was so small that I was actually wondering if my Dad--who is not a small guy--was going to be able to USE the bathroom, let alone change his clothes in it. So to avoid a parental nudity sighting, I scrambled over to Purl Soho, spent ungodly amounts on this beautiful fabric, and sewed myself a curtain that was 8 feet wide and 14 feet tall. (I know, tall, right? What this apartment lacked in bathroom, it made up for in vaulted ceilings. I wish we could have made a loft toilet or something...used some of that overhead space!)

Not caring much about seam allowances or evenly cut panels, I sewed that baby together as fast as I could and hung it up. It turned my apartment into a sort of gypsy-esque pasha palace, which I liked. But what I liked best of all was not having to see any of my family members naked.
 
When I moved into my next apartment, I was happy to have doors, but I no longer had a need for my 14-foot tall room divider. And so it languished unused for three long years, which is basically a crime against humanity. But thanks to my detox energy, I remedied that and finally turned it into a quilt!
My original plan was to just fold the fabric in half widthwise and have it be the same on both sides, but I decided I wanted each side to be a little different. So on one side, you have the original side-by-side vertical stripes of patterned fabric. On the other side, I cut three strips of the patterned fabric and put two strips of muslin between each patterned strip. Whamo...now it's horizontally striped on the reverse!
Can I just talk for a minute about my love of muslin? I feel like it has a bad name. It's basically just an unbleached cotton, and as most people who have watched Project Runway know, muslin is what is used to make "test garments"--like, a designer will literally make a garment using muslin to test how it fits and drapes before they use their super-pricey fashion fabric to make the actual garment. And when they're done, I can only assume that they throw their muslin out like common trash (I am probably wrong about that.) But personally, I think that unbleached cotton is gorgeous! It's off-white with sort of a nutty complexion, and with a little bit of textural and tonal imbalances. I like it. In fact, every time one of my sewing book authors talks about making a test garment out of muslin, I secretly want to ask her to give it to me when she's done. You can keep your fashion fabric...make mine muslin!
Anyway, I can honestly say that I don't know which side of The Quilt of Burning Love I like better. Sweet and Musliny? Or Gypsy Romance? (Those are their names, by the way.)

For the actual quilting, I decided on simple vertical stripes. I love the way it goes against the horizontal panels on the Sweet and Musliny side, and with the stripes on the Gypsy Romance side.

OK, one last thing. I've made a few quilts in my life, and each time, I manage to eff up the binding pretty bad. I just can't figure out how close to sew it to the edge or something. And I pretty much refuse to sew a binding on by hand. Not gonna do it. But on this quilt, I figured out a way to completely machine-sew the binding AND have it look really nice. Here's how I did it:
Cut a 2-1/2" strip of fabric that is the circumference of your quilt, plus about six inches. Iron the whole strip in half lengthwise. Align the raw edge of the strip with the raw edge of your quilt (with the folded part facing up since it's gonna fold up and over the edge of the quilt after you sew it on the first side). Sew the strip to the quilt 5/8" from the raw edges. Then fold it up and over to the other side of the quilt and tuck the edges under so that they perfectly align with the stitch line you just sewed, pinning in place as you go. Then go to your machine and zig-zag stitch along the edge of your binding right where the binding meets the quilt. It will be right on the edge of the binding on both sides, and the zig-zag makes it look cute. DONE!

Oh, and since you're probably wondering, Camper helped A LOT. Especially every time I needed to get on the floor and cut something out. Super helpful. As always.

Sunday, February 12, 2012

Out With the Icky

When I first moved to Brooklyn, I did not have even one solitary chair to sit my butt down in. I had two large bags and a guitar. The rest was being shipped. The only shoes I brought with me were a pair of flip-flops, a pair of sneakers, and a pair of cowboy boots. I had a knitting project I was working on, a book I was reading, and my laptop. I brought my teddy bear with me, and some bedding. That was it, folks. It was a weird time. (Incidentally, my first box to arrive came two weeks later and it contained nothing but hats and bathing suits...I was so bummed.)

The guy who had my room before me was kind enough to leave me a bed and a desk, and Arvi, my new roommate--a friend of a friend who I had met only once--gave me a chair. It was a simple wooden chair with shiny red vinyl on the seat. And it was one of the first things that started to make me feel like I had a home. Some time soon after I received the chair, it developed a small crack in the vinyl, and thousands of horoscopes later (yes, I was a horoscope writer when I first came to New York), I had turned that crack into a lightning-bolt shaped shred that ran from one end of the seat to the other. 

Five years passed in this manner, and each time I looked at the chair, I though yick. That looks terrible. But for some reason, the thought of fixing it never really crossed my mind. 

Which leads me to wonder, how many things do we look at in our lives each day and think, yick, that looks terrible, before we just move on? For me, that list is long. And honestly, if I took a good hard look around my home and asked a question as precocious as "what can I make better?" the answer would most likely be EVERYTHING. From the state of the junk drawer to a dusty lampshade in a corner to the overcrowded mini-trunk where we keep our hats to our couch cushions which have somehow revolted into unruly plump ovals. Individually, I don't really care about any of these things--I'm not going to lose sleep because we don't have enough hooks to hang our coats--so I am usually content to turn the other way. But cumulatively--like, when each room in your house has two or three of these eyesores, and your hair isn't looking all that good, and you realize that all of your favorite clothes are either missing buttons or are ripped--when looked at all together, these things can start to get you down. 

And so, I must say this: Don't underestimate the power of sewing on a button. You can't fix all of these things in one day--you just can't. And I literally just tried this weekend and it was miserable and I failed. But just one small improvement--not even every day! Just, like, one a week. Or one a month even! That one little improvement could be the thing that keeps you from slipping into the swamps of sadness. (Well, that's my opinion on the matter anyway.)
So about that chair. This week, I had a revelation. You see, I bought a bunch of upholstery fabric a couple months ago to make my Modern Carpet Bags, and much of it has just been sitting around. But then it hit me: one uses upholstery fabric to upholster things! Like...ripped chair seats!

This revelation occurred on a Tuesday night, while Robb and I were home in our pajamas. I held up three pieces of upholstery fabric before him, he picked the only option that wasn't hot pink (surprise surprise), and we flipped the chair over to start our reupholstering pajama party!

Robb got out his drill and removed the four screws that held the seat in place (though one could easily do this with a screwdriver.) We spent some time fiddling with the staples under the seat, using the back of a hammer, pliers, and various shivs to remove them. Then we realized we could just lift up on the vinyl and the staples popped right out. Voila!
We cut out fabric to fit the seat (plus a few extra inches just in case), and folded the fabric up and over the back of the seat, pulling it tight on opposite sides.
 And then we stapled it in place (Camper approved of our work.)
 Camper then helped me miter the corners. (Thanks, Camper!)
It's actually a little tricky to get the corners just right since you don't want the fabric to pucker on the side of the chair that will show. I found I could get a nice smooth corner if I folded little bits of fabric on top of each other in a fan-like fashion.
And then you staple-gun the bejesus out of it.
Once the fabric was pulled nice and tight and securely stapled, we trimmed away the extra fabric and screwed the seat back in place. All in all, about one hour's worth of work. One hour and five years, that is. Because that, sometimes, is how long it takes to realize that you can fix something. And that it might actually be easier than you think.