Last Sunday started off all wrong. We woke up in the morning and decided to go to the "dog beach" in New Jersey, so from a sleepy state in bed, Robb reserved a zipcar on his phone, and I set about making some iced coffee. We left the house in a rush, took the subway two stops to the most unfortunately named subway stop (Flushing), and then when we got above ground, Robb received a voicemail saying that the people who had our zipcar were going to be late. Real late.
We decided to cancel.
On the way back home--no dog beach, no ocean--I got terribly cranky. I wanted to swim, damn it! And here I was, locked in this ugly Brooklyn jail, all stupid concrete and asphalt. On the way back to our house, Robb noticed some people walking by us with towels over their shoulders on their way back from the McCarren Pool. He made me go ask them if the line was long, and they said, no, there's no line at all. We knew right then that we would go swimming...at the giant public pool that we had never been to! All this time, we had thought that it would suck, figuring it would be crowded, gross, with dirty kids running around everywhere. Not so...it was pretty and blue and big and open, and we swam some laps and snoozed on our towels. From that point on, the day looked up.
And as inspiration for this coming weekend--nay, the last weekend of what truly feels like summer--I wanted to post some inspirational photos from my last Sunday. It is my sincerest wish, dear friends, that your weekend will deliver.
This is a lettuce plant that bolted. Like, beyond bolted. I think it's pretty. It's also probably pretty bitter.
This is a supersteak tomato that soon enough will be ready for eating.
And these are our wet towels and bathing suits, hanging up after a day of swimming. (The Ciroc towel, by the way, was my prize for winning the Michael McDonald singing competition one night at NitaNita...proud memory, for sure.)
Here are two rising loafs of bread that I decided to make on a whim. They were very salty. Which is great if you like salty bread (I do).
Here are the almonds that I accidentally spilled in my purse. I had to dump them on the counter, which always feels classy.
And here is the binding on my newest Alabama Chanin dress. It's sloppy and it looks like straw, an aesthetic choice that I feel okay about.
Showing posts with label Baking. Show all posts
Thursday, August 30, 2012
Monday, July 23, 2012
Campfire Apples & Peaches With Whiskey Caramel Sauce
On a camping trip many moons ago, Robb and I invented an alternative to the classic s'more: we chopped up an apple and threw it onto a piece of foil with a few caramel candies, then we wrapped it up and chucked it into the fire. Once we extracted the bundle, it was pretty yummy. But it wasn't perfect. I seem to recall that the apples weren't cooked evenly, and the caramel stuck to the foil in places and melted in an altogether questionable manner, as though it wasn't quite sure what to do.
Many summers have passed since then, but as Robb and I shopped for our camping trip this last weekend, I found myself thinking fondly of our apple experiment and wanting to do better. The truth of the matter, which I might as well confess now, is that I'm a little tired of s'mores. The stick-hunting, the messiness, the way I always break the graham cracker in the wrong place. (I mean, it's perforated...how hard can it be?) But I DO love dessert, especially while sitting around a campfire, and so I once again reached for a couple of apples and a bag of caramels as I perused the ShopRite aisles.
Robb and I are pretty low-maintenence campers. We should probably have a camping stove. Hell, we should probably have camping chairs. But in a way, we can't be bothered. Instead we just bring an old, cruddy skillet that we can put on the fire, and when we're ready to eat, we sit on a picnic bench or perhaps a log. Done and done.
As I chopped up apples for dessert, I started eyeing all of the ingredients splayed out on the picnic table and came up with a master plan. Instead of just apples, let's also use these peaches we bought from the farm today. And instead of foil, let's use the skillet. And instead of just caramels, let's add some butter. And just when you think it's done, let's douse the whole thing in whiskey and light it on fire.
When the blue flames appear, you know something magical is happening.
Incidentally, we had to do the whiskey flambe part a few times so that I could get a decent photograph (a task I am still not sure we achieved), so our sauce turned out especially lively.
But wowie zowie was it delicious. After we ran out of the cooked fruit in the pan, we started cutting more fruit and running it through the bottom of the pan. And then I had to get gross and lick the spatula.
If you, too, would like to lick the spatula on your next camping trip or even at your next backyard campout, here is the official recipe!:
Campire Apples & Peaches With Whiskey Caramel Sauce
1 or 2 apples (I like Pink Lady)
1 or 2 peaches
8 to 10 squares of soft caramel candies
2 tablespoons butter
2 (or 3 or 4) ounces whiskey (I like Jameson)
Chop up the apples and peaches into bite-size chunks and toss in the skillet with caramel candies and butter. Place the skillet over the fire and stir the ingredients now and then with a spatula (or just flip the fruit around in the pan a bit). Once the caramel and butter begin to melt, keep stirring and let everything get nice and oozy. After a few minutes, appoint a brave person to reach into the pan and try an apple...when it's soft, you're ready to add your booze. Pour the whiskey right into the pan, then tilt the pan ever so gently into the flame. When the pan catches fire, keep the ingredients moving by shaking the pan, and try not to get distracted by the squeals of delight erupting all around you. The flames will extinguish after the flames go blue (which is a sign that the alcohol has burned out). Grab a fork...you're ready to eat! For the ultimate campfire experience, I recommend eating straight out of the pan.
Sunday, June 3, 2012
Best Damn Strawberry Rhubarb Pie Ever
As I have said numerous times on this blog, I am not a great pie maker. The problems usually begin with the crust and then spiral out of control when I introduce the filling. It is for that reason that I did not hold high hopes for this particular pie. (Hence, no "process" photos, not even a photo of a the whole finished pie.) We were simply hosting a small barbecue, there was rhubarb at the farmer's market, and I thought, oh, why not...I'll make a pie. It was not until I scooped out a few slices with my friend Jess and we each took a bite that I thought, oh my God, and ran inside to get the camera. "I must blog about this!" the neighbors heard me yell from my backyard.
And so, this blog post is a pretty simple one: I want you to make this pie. Here's how it works.
The pie is a riff off of the Rustic Rhubarb Tarts from the EXCELLENT book Canning for a New Generation by Liana Krissoff. The book is not just an excellent resource for all sorts of great canning ideas, it also includes some off-the-charts recipes. (Plus the author has a pretty cool name.) And now that I have made her pie dough, I am officially a believer.
I grew up eating my Grandma Gerry's pie dough recipe, which is essentially Crisco and flour, so I have a soft spot for salty crusts made with vegetable shortening, but this one also uses a bunch of butter. So yes, you CAN have it both ways. To make the crust, you put 3 cups of flour, a 1/2 teaspoon of kosher salt, 1 cup of shortening, and a 1/2 stick of butter in a large bowl. Use a pastry cutter (or two butter knives if you want) to hack the fat into little tiny bits. When they're small enough, make a well in the center and add an egg, a tablespoon of vinegar, and a few drops of ice water. Start stirring it in with a fork. (I eventually ditched the fork and just mixed it all together with my hands.) But don't mix too much! Stop mixing the moment you don't see any more dry flour. It's going to be a bit wetter than you might feel okay about. That's alright. Just pull the extra dough off your hands and fingers, form a sort of ball with the dough, and then wrap it up tight in plastic wrap. Let it sit in the fridge for about half an hour.
Once it hardened up a bit, I took it out of the fridge and decided to roll it out between two pieces of plastic. To do this, you just unwrap the ball (keep the plastic, though!). Lay a second piece of plastic wrap on your counter, drop the dough ball on it, and then lay your other piece of plastic wrap on top. Smooth the dough down into a nice, flat, round disc, and then use a rolling pin to roll it out till it's the right size for your pie pan. Then peel the plastic off of one side, and use the other sheet of plastic to help you do a flip-and-plop into the pie pan. I love this method because you don't have to keep adding more flour to prevent the dough from sticking to the counter or your rolling pin, so all you get is that pure buttery/Crisco-y flakey goodness. If you want a top crust, double these quantities, ok?
Now on to the filling! I used two pounds of fruit (one pound of strawberries, one pound of rhubarb, all cut about 1/2" thick). If you like your pie with a lot of fruit, I think you could cram in another pound. Put the cut up fruit in a bowl with a cup of sugar and mix it all up. Let it sit in the fridge for 4 hours (or overnight). You will be amazed by how much water comes out of the fruit after it macerates. You do NOT want all that water to go in your pie! (There is a special place in hell for soggy crusts.) Instead, put a colander on top of a pot and dump your fruit into the colander, letting all of that juice drain into the pot. When it's all drained out, put the fruit back in the bowl and add a little vanilla, 1/2 teaspoon of ground cinnamon, juice of half a lemon, and 3 tablespoons flour. Mix it all together then drop the fruit into your pie crust, dotting the top with a few nubs of butter. Then bake it for about 40 or 50 minutes at 400 degrees.
While it's baking, put that pot with the fruit juice on the stove, and cook it on high heat till it's reduced by half. (If you go too far and it gets really thick, just add some water.) When the pie comes out of the oven, drizzle the reduced syrup over the top of the pie. Magic, people. I'm telling you. Get thee to your farmer's market for some rhubarb and strawberries and MAKE THIS PIE!
Monday, May 14, 2012
Big Winner: Chocolate Caramel Cookie Bars
It wasn't until just a couple of years ago that I realized how odd it was that my mom made us sit on newspapers. As though we were DOGS being POTTY TRAINED. But as long as I got to eat caramel corn, I didn't care.
So when it came time to decide what to make for last week's bake-off, I knew it had to be something caramel. As I perused my cookbooks and various sites for inspiration, I knew I'd hit the jackpot when I found the Chocolate Caramel Cookie Bars on good ole Martha Stewart's site.
The recipe has shockingly few ingredients and really doesn't take that long to make. If you know how to make caramel. Which I didn't. (That was my mom's job!!) While the super-simple shortbread is in the oven, you're supposed to get started on your caramel. But before I got started, I read through all of the comments from users on Martha's site, and the common theme seemed to be this: the caramel is easy to eff up. Uh oh, I thought. I'm pretty good at effing up baked goods, so these comments seem likely to apply to me. Cautiously, I combined my sugar and 1/4 cup water in a small pot and I got to whisking. They say to use a pastry brush to occasionally wet the sides of the pot with water, which will keep sugar crystals from forming. It also says that your sugar is supposed to turn a deep golden brown after about ten minutes. Let it be known: neither of these things happened. In fact, ten minutes into it my sugar had turned completely clear and was the consistency of water. I knew something was wrong, so I dumped the contents of the pot into the trash can. When it hardened up over the scraps from that night's dinner, I realized what had happened: I had made rock candy! So I moved on to Plan B: Just put the sugar in the pan with no water and heat it slowly over medium. I could feel the wisdom from my mother wash over me...that's what she was doing at the stove! That's why there were no measuring cups and no recipe! That's really easy.
After about 5 minutes of occasional stirring, the sugar starts to turn light and fluffy and a little bit tan, and then another 5 minutes later, it starts to melt and get sticky, and 5 minutes after that, you have caramel. Done! Fold in your butter, cream, and chocolate and you have the flavor of happiness in your house.
So I admit, I felt a bit like a cheat because the competition had a cookie theme and these cookies are more like candy. Or bars. Or Twix Bars, to be more accurate. And I had considered doing a more traditional cookie for the bake off...how about a lovely ranger cookie? (Seriously, coconut, chocolate chips, and krispy cereal are a delicious combination.) But if I wanted to win, I knew I needed to bring the goop. And damn it, this was my fifth bake-off! I wanted to win already!
Unfortunately, I had a headache on the day of the bake-off (probably from eating too much caramel), so I didn't get to try anyone else's cookies except for these cute little cream wafers cuz they were so cute I could not resist. (And they were delish!) So when my name was announced as the FIRST PRIZE WINNER, I must admit that I did not know if mine were actually better, because I tried no one else's. But I don't really care because I WON. FINALLY!
And now you can be a winner, too. Here's the recipe:
Martha Stewart's Chocolate Caramel Cookie Bars
For the Crust:
9 tablespoons unsalted butter, room temp, plus more for parchment
1/4 cup packed light-brown sugar
1 1/2 cups all-purpose flour
1/4 teaspoon salt
For the Chocolate Caramel:
10 1/2 ounces semisweet chocolate chips (about 2 cups)
1 1/2 cups granulated sugar
6 tablespoons unsalted butter
1 cup heavy cream
1/2 teaspoon salt
1 tablespoon kosher salt
Preheat oven to 350 degrees. Make the crust: Line a 9-inch
square baking pan with parchment, leaving an overhang on all sides;
butter parchment, excluding overhang. Beat butter and brown sugar on
medium speed until pale and fluffy, about 3 minutes. Add flour and table
salt, and beat until just combined. Press dough evenly into pan, and bake until lightly browned, about 30 minutes.
To make the chocolate caramel, place chocolate in a medium bowl. Heat granulated sugar a in a small saucepan over medium heat, stirring now and then, until amber, 10 to 15 minutes. Remove from heat. Add butter, cream, and salt. Bring to a boil, stirring until smooth. Pour over chocolate. Let stand for 2 minutes. Stir to combine, and let stand until cool, about 10 minutes.
Pour mixture over crust. Refrigerate at least 4 hours, or overnight. Run a knife around edges; lift parchment to remove whole bar from pan. Sprinkle with kosher salt. Trim edges, and cut into tiny bite-size bars so you don't eat too much and get a tummy ache.
Tuesday, March 20, 2012
Goat Cheese & Honey Cheesecake
![]() |
This pretty tart is NOT my cheesecake. But it's pretty! |
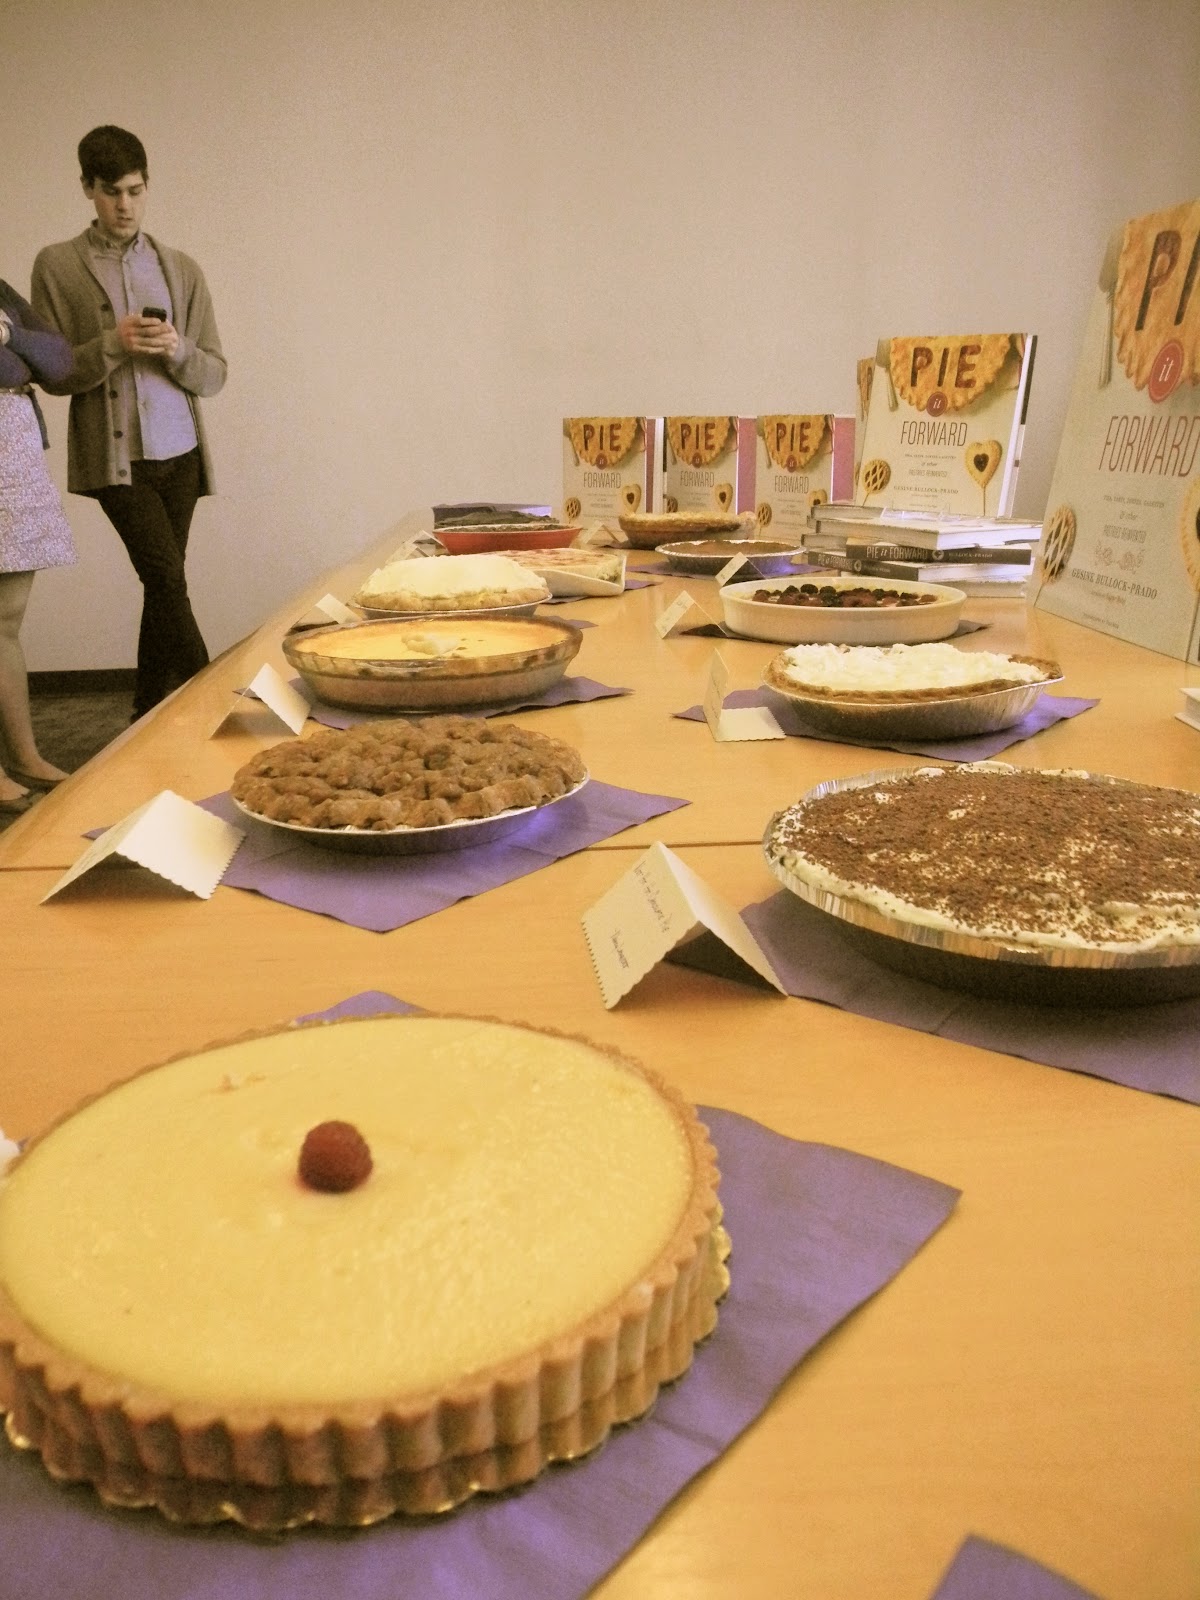
The truth of the matter is this: I was not so sure at all that entering the bake-off was such a good idea. As of late, I have simply had too much to do!! In just one week, Robb and I take off for a fun-filled 10 days (TEN DAYS) in sunny Spain. And for the last month and a half, I have been working my tail off to ensure that A) this vacation doesn't make me get woefully behind at work, B) I don't leave any unexpected messes on anyone's desk, and C) I won't think about work AT ALL while I am in Spain. And so, there have been some long hours. And there have been some nights where I woke up in a cold sweat, worried about, like, whether or not the project where you build a coffee table and grow plants inside of it is technically a terrarium or a miniature greenhouse, and if the latter, will all of the plants die if they don't have drainage?
What a silly thing to lose sleep over! But these, I'm afraid, are the things that haunt me.
And so, it was with some sort of foolish combination of energy and enthusiasm that I agreed to enter last week's company bake-off.
The contest was pie-themed! But unfortunately, pies are not really my forte. Because Robb wasn't around to make my pie crust (he is MUCH better at pie crusts than I am), and because no fruit, except like quince, is in season right now, I decided to make a cheesecake. A goat cheese and honey cheesecake, with a strawberry swirl on top.
This is my cheesecake! Sort of pretty. |
Something else won. Something chocolatey.
I don't think this pie was the winner, but isn't it pretty? |
If you have about 2 hours to kill and you're broke, might I recommend a modification? Cut all of the filling ingredients in half to make a short cheesecake, and just put it right in the fridge once it's cooled. It becomes almost more like a fancy frosted graham cracker cookie, and the richness of the goat-and-cream cheese and sweetness of the honey become a little less overwhelming. (Yes, I'm one of those people that is overwhelmed by cream cheese...and yes, I tend to scrape off half of the goop that comes on bagels...why do they think I need all that? So messy!)
Without further ado, I present to you the non-award-winning adaptation of...
Warren Brown's Honey and Raspberry (er...Strawberry) Cheesecake, from United Cakes of America
For the Graham Cracker Crust:
9 full graham crackers
3 tablespoons superfine sugar
3/4 stick unsalted butter, melted
1/8 tsp salt
For the Filling:
16 ounces cream cheese
16 ounces goat cheese
1/2 cup superfine sugar
1/2 cup honey
4 eggs
1/4 cup sour cream
1/4 cup heavy cream
2 teaspoons vanilla extract
1/4 cup strawberry puree (To make the strawberry puree, bring about a cup of sliced strawberries and a half cup of sugar to a boil. Cool down, blend in a food processor, and set aside.)
Preheat the over to 300 degrees. Grease a 9" x 3" round pan and line the bottom with parchment. (Note that I was too scared to use a spring-form pan--thought it might leak in the water bath!--so I used a shorter cake pan instead. But if you use a spring-form pan and succeed, let me know.)
Crush the graham crackers (a food processor helps) into fine crumbs and toss it with the rest of the crust ingredients. Press it firmly into the pan and bake for about 10 to 12 minutes. Set aside to cool and leave the oven on.
Put a roasting pan in the oven and fill it about 2/3 full with water.
In the bowl of a mixer, beat the cheeses on medium speed to soften them. Reduce the mixer to slow and add the sugar and honey in 2 additions each (about 3 minutes total). Add the eggs one at a time, allowing each to combine. Mix the sour cream, heavy cream, and vanilla together, then pour into the mixer slowly.
Pour the filling into the crust and drizzle about 1/4 cup of strawberry puree on top. Use your fingers to trace a swirly fancy design into the top.
Set the cake pan in the water bath and bake for about an hour. (The center of the cake should be slightly wobbly when you nudge it...that's the best I can describe it...sorry!)
Turn off the heat and leave the oven door ajar for 1 hour. Remove the pan from the water bath and let it cool for another 4 hours. Then put it in the fridge overnight.
Run a spatula around the edges to loosen it and plop it onto a plate for serving. Eat it!
(And if you're making the cheater version, bake it for the full hour so it really cooks through, but just pull it out of the oven and let it cool on the counter for a bit. Then eat it!)
Tuesday, January 17, 2012
The Rise and Fall of Bread
This time of year, the littlest of setbacks can be heartbreaking. I sometimes think to myself, in the midst of one of these fits, if you can't deal with this, then how on earth are you going to deal with the REAL stuff in life? The things that are actually hard?
I am describing, of course, the way I felt last night when my sourdough bread baked up awful.
On Sunday night, I was so tired. I was going to meet up with a girlfriend for some wine and cheese and I just couldn't do it. We postponed until the following night, and I thought to myself, I shall make bread! I will be that awesome friend who flakes on Sunday but makes up for it on Monday with a fabulous loaf of homemade bread--the perfect carrier of cheeses, be they soft or hard!
Though I was tired, I pulled my sourdough starter out of the fridge for examination. I'm sorry to say, it's been some time since I've used the starter--maybe six months?--and the batter had developed, well, I guess you could call it a grayish-black film on top. Now, my dad had warned me this might happen. NOT that he is the most trustworthy source on when it's time to throw food out...this is the man, after all, who recently ate a jar of unsealed olives we had sent him cross-country and reported they had "a slight funk" but still tasted great. However, the man has been baking sourdough bread for thirty years and hasn't died from it, so I thought it wise (or at least not insane) to accept his advice of "scraping off the black parts" and using the batter beneath it. Which I did (much to Robb's horror). And then I mixed in some more flour and water in equal parts to freshen things up. Voila! I was ready to bake some (possibly toxic) bread.
I mixed up my batter and let it rise overnight, and in the morning I woke up, thanked my lucky stars (and MLK) we had the day off from work, and then I set about making my dough, which got stuck in my friendship bracelet while I was kneading it (which is the most hipster statement I've ever made in my life).
Two hours of rising, punch it down, another hour and a half of rising, punch it down. Split it in half and let it rise again.
I must say, this day-long ritual of bread-baking started to have a familiar ring to it...a winter ritual of rising up now and then, only to be occasionally punched down. Over the smallest things really (perhaps we're more delicate in winter.) A really good cup of coffee can make my day, a wintry mix on the way to work can make me feel ill. And don't get me started on the pot of paper white bulbs that shot up into the air so so fast in December (glee!), but decided to dry out just before they bloomed, their tall green stalks reminding us of their unfulfilled destiny. Making me wish they were onions instead. Something at least useful. January is all about the ups and downs. January makes me want to take a box of cookies into the bathroom and eat them alone in sulky silence.
I baked the bread at 375 degrees for 45 minutes, but the loaves looked so anemic, so pale and pasty. I knew they weren't done. And so I let them bake for five more minutes. Robb put on his sweatshirt; the puppy carried his leash around in his mouth. They were waiting for me so that we could all go to the dog park. And I kept saying, it's almost done! You can't rush the loaf! Five more minutes, another five minutes. Soon it had been over an hour. The dog was laying on the floor in front of the door, wishing he could take a box of cookies into the bathroom and eat them alone in sulky silence.
I took out my loaves, knowing in my heart of hearts that they were not done. But also knowing that they would probably never be done. That there was something wrong with the fundamental chemistry of the bread, with the leavening agents, and hell, probably with the grayish-black film on the starter, too. And sure enough, when we returned from the dog run, I sliced off a piece to find a slackish doughy loaf. I smothered it in butter and ate it. I sprinkled it with kosher salt and continued eating it. And then I cut off another piece from the other underbaked loaf and ate it the same way. It was hot and there was too much butter and it wasn't at all what bread is supposed to taste like. But melted butter and kosher salt can make anything edible.
I ate two slices and sulked, thinking I should probably eat them alone in the bathroom. Instead I licked my fingers, picked myself up off the couch, and walked with Robb to work. On the way there, snow fluttered in a spontaneous burst, and we looked up at it as we passed under streetlights. It was just refreshing and just pretty enough to help me forget the wasted day, my head rising toward the dark sky and the promise of a breadless night with friends.
Sunday, October 30, 2011
DIY Candy Corn
When I first started vetting projects to include in the Bust DIY Guide to Life, there was one project that truly intrigued me. Possibly more than any of the other projects in the book. The DIY Candy Corn! (Or, as it is called in the book, "Confection Perfection"). You see, this is my kind of craft project. It's one of those things that had never even occurred to me I could make at home. As in, this candy seems so inhumanly manufactured that I'm shocked it contains ingredients that one might find in a grocery store. But alas, it can be made! By human hands, in fact. And so, since it's Halloween and all and on Saturday it snowed and we couldn't conceive of actually going anywhere for the first twelve hours of the day, we decided to make candy corn.
The first step to DIY candy corn is to make a boiling mess of granulated sugar, corn syrup, and butter. Nine out of ten dentists agree that just thinking about this combination of ingredients will make your teeth lose enamel. Once this combination reaches a kind of voluptuous sinister boil, you add some powdered sugar and powdered milk, a little salt and vanilla, and your "dough" is done. Are you horrified yet?
Once it's cooled down a bit, you separate the "dough" into three parts and dye one group yellow and one group orange, and you leave that last group au naturel.
Around this time, Robb walked into the kitchen and I could tell by the fascinated-yet-disturbed look on his face that he wanted to be a part of the candy corn making. And thank goodness he did! Because someone had to keep their hands un-sticky to take photos. Robb got to rolling that dough out into thin little snakes. (The orange ones, when photographed alone, look disturbingly like long hot dogs.) He laid them out side be side and squished them together with his hands.
Then he smoothed them across the top with the flat end of a wooden spoon, which really seals the gap between the layers.Then, the fun part! We grabbed a knife and started cutting out the strips into "corn" shapes. (Also, I'm sorry, but candy corn is not shaped anything like corn. Just FYI.)
We were super stoked when we cut out our first strip of candy corn, but then we quickly grew a little tired of the process. You see, the candy hardens up as it cools, so you have to work fast. And there were so many candy corns to make! It was seemingly never ending! (In reality, however, the whole production probably took about 45 minutes. We just have short attention spans.) We also got tired of the classic Halloween colors and did one batch with a green stripe. Hilarious true story: a guy at the bar last night, who happened to be dressed as Salieri from Amadeus, ate a piece of the regular candy corn and then ate a piece of the green candy corn. While chewing the green candy corn, he actually said, "mmm...I like the fruit flavored kind!" There was no fruit flavoring. They are all the same. (Of course, we did not tell him this.) The power of suggestion is strong, my friends!
Ultimately, I can't decide if these taste anything like the storebought ones do. People say that they do, but Robb and I both think they taste like butter. Which is not exactly a bad thing. They definitely don't look like the storebought ones, which pleases me. Final verdict? I like these weird little candies.
Finally, because it's Halloween, I have to share with you a story of great coincidence! See these two pugs above? Well, when I asked all of you to vote on which dinosaur I should knit a couple weeks ago, a friend of mine was dogsitting these pugs. And when I opened up the voting to include kids and pets, these two dogs voted! But what's spoooooky is that my friend did not tell the pet's owners about the dinosaur votes (I mean, why would she?), but then just this week, she sees these photos on Facebook: Wonton and Mu-Shu dressed up as dinosaurs for Halloween! And look at those tiny forearms on Mu-Shu!! Anyway, I can't help but see this as a cosmic coincidence of the dinosaur variety.
And I'm sure that the pugs, along with any other interested parties, will be happy to know that my T-Rex is nearly stuffed! I will do a great reveal soon! Promise!
Saturday, October 22, 2011
2nd Place Bake-Off WINNER
If we are friends on Facebook then you probably saw my all caps SQUEALS OF DELIGHT on Friday after winning 2nd place in my company bake-off. Granted, I was on my 2nd glass of white wine, so I was feeling pretty good. But guess what? Now it's Saturday and I STILL feel pretty good. After all, I'm moving on up!
You see, one year ago I attempted my first ever company bake-off and had a complete disaster on my hands (remember the great meringue incident of 2010?). Needless to say, I did not even place. But then last spring, clearly inspired by the Royal Wedding, I took 3rd place with my cassatta cake! I must admit that I had been warned by a wise woman (who happened to have won the bake-off in the past) that if you want to win, you have to make something chocolate. And so I took it to heart and this time, I made the Grasshopper Bars from Baked Explorations.
This is a recipe that Robb and I have made a few times. It's one that we make when we feel our friends are getting too skinny. See that fluffy white layer in the middle? It's almost entirely made of butter. See that gooey layer on the bottom? That's a brownie--one that was taken out of the oven just one minute before it was done. See that top layer? That's chocolate and butter, poured over the cold creamy butter layer, which then hardens up not unlike my beloved Magic Shell.
Needless to say, there are a lot of fatty steps in this one. There's two separate layers that involve a double boiler for crying out loud! But on Thursday night, I got into my meditative baking mode and hoped that I could pull this off. You see, I've never made the Grasshopper Bars on my own--this is usually something that Robb and I make together--but he was out of town, so I summoned his presence by wearing his tuxedo apron. (Wow, is this a bad photo of me or what? In fact, I am nearly making the monkey face I mentioned a few weeks ago!)
Amazingly, the Grasshopper Bars came out pretty darn nice. The only thing I would have changed is making them a bit mintier. I had the creme de menthe, but I didn't have any peppermint extract, so I had to melt down some peppermint hard candies with a little water and pour it in. But you know what? It didn't matter! Because my coworker Ivy, baker extraordinaire, freaking nailed it with her brown sugar shortbread bars.
I know what you're thinking: chocolate and butter got beat by shortbread? But let me tell you, I knew I was not going to win when I took a single bite of her dessert. Somehow she managed to turn the center of these shortbread bars into toffee...I don't know how she did it. It was like magic. And just when you're realizing that the bar is chewy, not crumbly, a layer of nutella chimes in, adding depth to the symphony almost like a cello. The crumble at the top? It's just for texture. Something to throw you off, as though to say, Ha! You thought I was going to suck. And you were soooo wrong.
Finally, I want to point out the serving tray, because it actually was my favorite part. You see, the three "plates" are all on hinges and actually fold up vertically. It's like an old-timey Transformer! I was at a photo shoot earlier in the day and the stylist's assistants kept saying, do it again! Do it again! Were they amazed that an antique could have moving parts? I'm not sure! But it delights me, too, assistants. I get it.
But really finally, aren't these pictures so gross and sad? The gray meeting room table with the overhead florescent light is SO DEPRESSING! So here's a super-modern cutting-edge high contrast photo. Just to leave a slightly less depressing taste in your mouth. Yay!
And now, I shall start planning for the bake-off 6 months from now, when I compete for FIRST PLACE! It's sort of like watching the Rocky series, but less punchy.
Tuesday, July 12, 2011
Individual Ice Cream Cakes with Homemade Magic Shell
I really could have just stopped typing after writing the title of this post. The title and the recipe for the homemade Magic Shell is all you really need to know, right? Well, I can't help myself...I could wax poetic about the magic and mystery of these cupcakes for the rest of my life. So it is with great enthusiasm that I present to you my latest brainchild: Individual Ice Cream Cakes with Homemade Magic Shell.
(I had to say it again.)
This last weekend, Robb and I hosted an engagement barbecue for two very dear friends, Jess and Ryan. And though an engagement party is usually a grown-up classed-up occasion, we thought Jess and Ryan would enjoy a different approach. So instead we opted for burgers and pinatas in addition to champagne. Since Ryan has a sweet tooth, I knew I needed to do some kind of dessert. And so it was pure kismet when, two weeks ago, my sister reminded me about the ice cream cake I had made her for her birthday about ten years ago. That cake was highly experimental and involved a 9" cake pan with a thin cake on the bottom, a layer of fresh sliced strawberries, and ice cream packed tightly into the top part of the cake pan. I then doused the whole thing with Magic Shell--I believe it was a very thorough, very thick coating. I recall, for some reason, that it had some problems. Like the frozen strawberries were hard as rocks, or the Magic Shell was tough to cut through, and a "piece" came out of the pan more like a clump. But the concept...I knew there was something there. So ten years later, I decided to try it again in a more manageable cupcake format.
I started with the cake layer, of course. And because we were making a lot of other food for this barbecue and I didn't have a ton of time, I opted to go the Betty Crocker box-cake route (which is always bafflingly tasty if not slightly skanky). I also used prepackaged ice cream, though someday I plan to make these entirely from scratch: homemade cake, homemade ice cream AND homemade Magic Shell. For now, I will just enjoy the irony that the Magic Shell was the only thing in this dessert that I made "from scratch."
I used silver cupcake liners, assuming that the metal would help keep the ice cream cool. Also, I assumed paper would turn to mush after the ice cream began to melt in the heat of a July afternoon. Right? I filled each cup with between 1/8 and 1/4 cup of batter and baked 'em up.
Once the cakes had cooled, I grabbed my two favorite flavors of ice cream--mint chip and coffee chip--and started quickly scooping ice cream on top of each cupcake. I experimented with two strategies: pressing the ice cream down flat so there was a perfect seal between cake and ice cream, and doing more rounded scoops that I sort of firmly pressed into the cake whilst keeping the scoop shape. Aesthetically, I wound up preferring the latter, plus when you pour on the Magic Shell, it sort of drips down into the gaps between the ice cream and cake, filling in those empty spots and making hard little rivulets of crunchy yumminess. However you do it, you'll need to work fast, because, well, ice cream melts. If the ice cream gets too soft, put the carton and the cupcakes back in the freezer and let them harden up again, otherwise it will be hard to get that perfect little scoop shape.
My original intent was NOT to make Magic Shell from scratch. In fact, I only thought of it because it turns out that my local supermarket doesn't carry Magic Shell, but I had already baked my cupcakes and I was hell bent on the concept. So after some Internet sleuthing, I found what turned out to be the recipe. Ready? Here it is:
1 1/4 cups chocolate chips (or any kind of chocolate you like)
1/2 cup coconut oil
Melt them together in the microwave for about a minute, stir until smooth, and drizzle over ice cream.
That's it! Magic, right? I had always thought that Magic Shell was some sort of chemically produced slightly sinister confection, but the concept is really soo so so so simple: coconut oil is liquid when it's heated and hardens up when it's cold. So if you combine the coconut oil and chocolate when they're warm, then pour them over something cold, whamo, it hardens up. SO COOL. Terrifyingly, the same concept would work with butter or crisco or even lard--any kind of fat that hardens up at room temp or colder--but, um, I'm gonna stick to coconut oil for now.
The Magic Shell sauce is actually very thin, perfect for drizzling on in its trademark rivulets.
And then almost immediately the chocolate begins to seize up (in the photo above you can see the transformation before your very eyes!)
And then, finally, they get their perfectly shellacked finish.
They were treated with an enthusiastic reception at the barbecue! I didn't try one before the party, so I had the pure pleasure of watching people grab them off of the tray as I passed it around and start chomping into them.
For me, the beauty is when you pull away the wrapper and examine the cupcake's cross-section. Something about that cakey bottom, the about-to-start-melting ice cream layer, and glistening hardened chocolate, each layer fluted around the edges by the pleated cupcake liner. It is in that moment that you get a rush (could it be adrenaline?) when you realize, my God, I have to start eating this fast, for you know that it's at its very best when the ice cream is cold and the Magic Shell is crisp.
Sunday, July 3, 2011
Fireworks & Hamburger Cakes
And so it was in a moment of 4th of July nostalgia and passion that I decided to make these cookies. I saw them a few days ago--Martha Stewart's Fireworks Cookies--and I thought to myself, now there's something that I could really make look terrible. As much as I knew I should not attempt to make these cookies, I couldn't help myself. You see, we're going to Morgan's lake house tomorrow, and she's an old friend from back in the car rally days. And, well, there's a little piece of me that enjoys taking something that Martha Stewart perfected and photographed beautifully, and giving it the old Liana spin (i.e., effing it the eff up.)
And so I rolled up my sleeves and made the sugar cookie dough, recalling as I started to roll it out that I don't even really like sugar cookies. I mean, I'd rather have a chocolate chip cookie any day of the week! But still, I carried on, reminding myself that no one ever wanted to eat the hamburger cake. It's more about making a spectacle than making something delicious.
As I manhandled the frosting and coerced it into pastry bags, I also recalled that I don't have much patience for frosting things. And so I hurriedly squeezed out my frosting and ran my toothpick through the concentric circles, and sort of counted the seconds until it was all over. When the cookies were all frosted, however, I looked at them all together and decided that I LOVE them. They're not so much "patriotic" or "firework-esque" as they are groovy psychedelic hippie cookies, with flower and spiderweb motifs. Totally fine by me. God bless America...these cookies are ridiculous.
In honor of the hamburger cake (i.e., making something weird out of a confection), I used the leftover dough to sculpt what started out as a pig, and then turned into a bear, but eventually became a sheep, all precariously held together with icing that gooped in drips and drabs on its way to becoming hardened.
But I love him all the same. Perhaps we will come up with a game tomorrow at the lake where the pig/bear/sheep will be the last place prize?
And finally, because it's July!!, I thought it was high time to give you a wee garden update. The pole beans and snap peas are my favorite new arrivals. Each morning I go outside hunting for them. They grow inches each day, I swear! And the more you pick them, the more they grow. I spend quite a bit of time internally debating whether each one is long enough to pick, if I should let it grow just a bit longer, or if it's better to get it off the vine. And once I do, what shall I cook? Are there any recipes that only call for six pole beans?
The tomatoes are at my favorite point in their growth--vibrant healthy green with rich and earthy smells that cling to your skin, eau de tomato. And best of all, the plants aren't yet out of control. They're tall--about up to my waist--but aren't yet falling over onto each other, weighed down with fruit, twelve plants turned into a singular mass of unruly tomato monster. It happens every year, and you'll see it this August, but for now, I'm enjoying these little yellow flowers and petite green tomatoes. They're perky, right?
Last and decidedly weirdest, the cucumbers. They have started their awkward climb to pickledom. The plant produces these big yellow flowers, and then the cucumber starts to emerge from behind the flower, literally pushing it away from the plant on its tip. I think this is the most ridiculous looking life-form in the garden. It's like if Pinocchio not only had a long nose, but a giant flower on the end. Or it's like some sort of sexy get-up, like a cabaret dancer wearing pasties...but just on one boob. And yet, and yet! When the cucumber is all grown in a few weeks and I'm eating it on my sandwich, I'll no longer be thinking it's so ridiculous. Though, now that I've said that thing about pasties, I might be thinking about that...oops...my bad.
Subscribe to:
Posts (Atom)