Sunday, October 30, 2011

DIY Candy Corn

When I first started vetting projects to include in the Bust DIY Guide to Life, there was one project that truly intrigued me. Possibly more than any of the other projects in the book. The DIY Candy Corn! (Or, as it is called in the book, "Confection Perfection"). You see, this is my kind of craft project. It's one of those things that had never even occurred to me I could make at home. As in, this candy seems so inhumanly manufactured that I'm shocked it contains ingredients that one might find in a grocery store. But alas, it can be made! By human hands, in fact. And so, since it's Halloween and all and on Saturday it snowed and we couldn't conceive of actually going anywhere for the first twelve hours of the day, we decided to make candy corn.
The first step to DIY candy corn is to make a boiling mess of granulated sugar, corn syrup, and butter. Nine out of ten dentists agree that just thinking about this combination of ingredients will make your teeth lose enamel. Once this combination reaches a kind of voluptuous sinister boil, you add some powdered sugar and powdered milk, a little salt and vanilla, and your "dough" is done. Are you horrified yet? 

Once it's cooled down a bit, you separate the "dough" into three parts and dye one group yellow and one group orange, and you leave that last group au naturel. 
Around this time, Robb walked into the kitchen and I could tell by the fascinated-yet-disturbed look on his face that he wanted to be a part of the candy corn making. And thank goodness he did! Because someone had to keep their hands un-sticky to take photos. Robb got to rolling that dough out into thin little snakes. (The orange ones, when photographed alone, look disturbingly like long hot dogs.) He laid them out side be side and squished them together with his hands.
Then he smoothed them across the top with the flat end of a wooden spoon, which really seals the gap between the layers.
Then, the fun part! We grabbed a knife and started cutting out the strips into "corn" shapes. (Also, I'm sorry, but  candy corn is not shaped anything like corn. Just FYI.)

We were super stoked when we cut out our first strip of candy corn, but then we quickly grew a little tired of the process. You see, the candy hardens up as it cools, so you have to work fast. And there were so many candy corns to make! It was seemingly never ending! (In reality, however, the whole production probably took about 45 minutes. We just have short attention spans.) We also got tired of the classic Halloween colors and did one batch with a green stripe. Hilarious true story: a guy at the bar last night, who happened to be dressed as Salieri from Amadeus, ate a piece of the regular candy corn and then ate a piece of the green candy corn. While chewing the green candy corn, he actually said, "mmm...I like the fruit flavored kind!" There was no fruit flavoring. They are all the same. (Of course, we did not tell him this.) The power of suggestion is strong, my friends!
Ultimately, I can't decide if these taste anything like the storebought ones do. People say that they do, but Robb and I both think they taste like butter. Which is not exactly a bad thing. They definitely don't look like the storebought ones, which pleases me. Final verdict? I like these weird little candies.
Finally, because it's Halloween, I have to share with you a story of great coincidence!  See these two pugs above? Well, when I asked all of you to vote on which dinosaur I should knit a couple weeks ago, a friend of mine was dogsitting these pugs. And when I opened up the voting to include kids and pets, these two dogs voted! But what's spoooooky is that my friend did not tell the pet's owners about the dinosaur votes (I mean, why would she?), but then just this week, she sees these photos on Facebook: Wonton and Mu-Shu dressed up as dinosaurs for Halloween! And look at those tiny forearms on Mu-Shu!! Anyway, I can't help but see this as a cosmic coincidence of the dinosaur variety.
And I'm sure that the pugs, along with any other interested parties, will be happy to know that my T-Rex is nearly stuffed! I will do a great reveal soon! Promise!

Friday, October 28, 2011

Pretty Stuff

It's Friday. Why not look at some pretty things? These are all, in fact, pretty things that I have had the pleasure of looking at in person in the last few weeks. I remember a creative writing teacher saying to me once, "notice what you notice." And so here I am, noticing what I notice. And sharing them with you. (I usually just share this stuff with my hard drive, where I then promptly proceed to forget it exists.)

I feel like each photo should have a "Deep Thoughts" type of caption, or perhaps a motivational slogan. But alas, most of them go like this: Brooklyn, pretty.

At the top are a collection of chairs made from twisted champagne wires. And this is a pretty street in Park Slope.
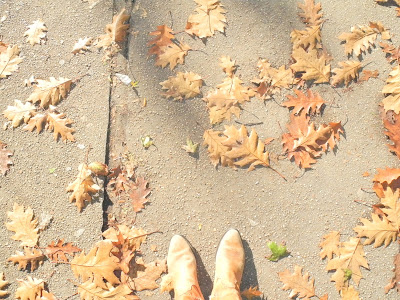
 This is my street this morning.
And these are my boots beneath that tree.

Monday, October 24, 2011

A Woman of Many (Ridiculous) Hats

As I may have mentioned before on this blog, my absolute favorite thing to knit are hats. You see, you can make them so FAST. Each one is just a little noggin warmer, after all--a couple hundred yards of yarn, give or take--and if you get real compulsive, you can knock one out in a night. In fact, the first hat I ever made was a pink and red crocheted cap that I started making at around 9pm and finished at 4 o'clock in the morning...I was so enthralled by what I was doing, I don't even think I got up to pee. When I was finally done with the hat, I plopped it on top of my head with the tail still hanging down from the middle and ran to the bathroom, realizing somewhere along the way that I had probably done permanent wrist damage....but no matter! I had made a HAT! A glorious girly hat! (And because I'm sure you're distracted by the giant beard in the photo above, I will tell you that this beard belongs to my lovely friend and former bandmate, Marc...he just happens to be in one of the only photos I have of this illustrious hat, circa 2004, San Francisco. Lucky Marc!)
It was just this last week, however--when I sold the Big Kiss Blue Hat (shown above) to a dear friend--that I realized my choice in hats might verge on the ridiculous. And that it maybe wasn't just an isolated incident or two. It seems that, more often than not, my hats turn out a little crazy!
Case in point: the hat shown above is probably the most normal hat I've ever made. I literally call this pattern my "One-Hour Hat" because you can make it so quickly (btw, it's more like two hours...I like to lie to myself when knitting). I made it with bulky Blue Sky Alpacas yarn that I had left over, and while it's a wee bit sporty with the stripes, it's cute, warm, and not too freaky-deeky. A couple months after I made this hat, I went to make another one in the blue yarn I used for the Big Kiss hat. I "thought" I was creating a crown just like I did in the One-Hour Hat, but as it turns out, I was making a spiral. A biiiiiig spiral. One that started out nice and wide and just kept on going. By the time I figured out I was making a wizard hat, it was too late to turn back. (I mean, you can always turn back, but honestly, I was kind of thrilled by what I had done!) I quickly realized that I loved the hat, but it was not "for me," so I put it up in my Etsy shop, where Sara snatched it up like the smart girl she is and wears it proudly!
Now, the reason why I think the elfin cone incident happened is because between the One-Hour Hat and the Big Kiss hat, I made this hat above, which DOES utilize a nifty swirl decrease to shape the top. However, in a beret-like situation, you CAN start out with a zillion stitches and do a slow spiral decrease and not create a "point." (Just in case you're wondering, and I know you are, this "slow spiral" I speak of is where you decide to decrease and you, say, *knit 9 stitches, knit 2 together* all the way around, then knit a plain round; then on the next round you *knit 8 stitches, knit 2 together* all the way around, then knit a plain round; and you keep decreasing like this until you have only a few stitches left.) OK, but do you notice something funny about this grey beret? It's huge. HUGE! And that's after I felted it to make it smaller.

Which leads me to my next problem: I hate making gauge swatches when I make hats.
Which is what happened with this hat. This was supposed to be a BERET. Let this be a lesson to all of us about the importance of gauge.
There have also been hats that I just knit too long, like this one from Modern Top-Down Knitting which was supposed to be a cute hip hat (like it is in the book!), but somehow turned into more of a flying nun type of situation. (Or, if I knit it in yellow and unrolled the brim, I could look like a Gorton's Fisherman ad.) 
(Total sidenote: doesn't this guy also look a lot like the Dos Equis "Most Interesting Man in the World"? Could it BE?)
Believe it or not, the Flying Nun/Gorton's Fisherman hat is not even the weirdest bonnet I've made. The question is not "why did I make a bonnet with bear ears"--oh no, the pattern itself is cute (it's from Stitch 'n' Bitch Nation). The question is "why did I make it using that gross pubic-looking yarn?" Needless to say, this one hasn't been worn out a lot in Brooklyn. Not even on Halloween. And yet...I can't seem to part with it.
Ok, ok, there have been a few winners, too. Like this Sunflower Beret that I made from Knitting Nature. It was a mother of a stitch pattern on the top, but it FITS and it is hands down one of my favorite winter staples and it really does keep me warm and goes with everything.
(Here it is from the back...look at all that fancy stuff!)
And then there's the "suit of armor" hat. Knit up in a yummy natural-colored alpaca, it is soft as can be and drapes beautifully, though it also sort of drapes into my eyes every now and then too.
And so I added a giant pom-pom, which keeps the hat sliding down the back instead of down the front.

But I swear to you, I am still searching for the perfect handmade hat. Even with so many hat patterns available and so many hats already in my collection, I still feel like I could make fifteen more and not be done. Knitters: if you have a favorite hat pattern that you love to make, please do share in the comments! I will love you forever. Non-knitters: you may proceed to make fun of me and my hats now.

Saturday, October 22, 2011

2nd Place Bake-Off WINNER

If we are friends on Facebook then you probably saw my all caps SQUEALS OF DELIGHT on Friday after winning 2nd place in my company bake-off. Granted, I was on my 2nd glass of white wine, so I was feeling pretty good. But guess what? Now it's Saturday and I STILL feel pretty good. After all, I'm moving on up!

You see, one year ago I attempted my first ever company bake-off and had a complete disaster on my hands (remember the great meringue incident of 2010?). Needless to say, I did not even place. But then last spring, clearly inspired by the Royal Wedding, I took 3rd place with my cassatta cake! I must admit that I had been warned by a wise woman (who happened to have won the bake-off in the past) that if you want to win, you have to make something chocolate. And so I took it to heart and this time, I made the Grasshopper Bars from Baked Explorations.
This is a recipe that Robb and I have made a few times. It's one that we make when we feel our friends are getting too skinny. See that fluffy white layer in the middle? It's almost entirely made of butter. See that gooey layer on the bottom? That's a brownie--one that was taken out of the oven just one minute before it was done. See that top layer? That's chocolate and butter, poured over the cold creamy butter layer, which then hardens up not unlike my beloved Magic Shell.
Needless to say, there are a lot of fatty steps in this one. There's two separate layers that involve a double boiler for crying out loud! But on Thursday night, I got into my meditative baking mode and hoped that I could pull this off. You see, I've never made the Grasshopper Bars on my own--this is usually something that Robb and I make together--but he was out of town, so I summoned his presence by wearing his tuxedo apron. (Wow, is this a bad photo of me or what? In fact, I am nearly making the monkey face I mentioned a few weeks ago!)
Amazingly, the Grasshopper Bars came out pretty darn nice. The only thing I would have changed is making them a bit mintier. I had the creme de menthe, but I didn't have any peppermint extract, so I had to melt down some peppermint hard candies with a little water and pour it in. But you know what? It didn't matter! Because my coworker Ivy, baker extraordinaire, freaking nailed it with her brown sugar shortbread bars.
I know what you're thinking: chocolate and butter got beat by shortbread? But let me tell you, I knew I was not going to win when I took a single bite of her dessert. Somehow she managed to turn the center of these shortbread bars into toffee...I don't know how she did it. It was like magic. And just when you're realizing that the bar is chewy, not crumbly, a layer of nutella chimes in, adding depth to the symphony almost like a cello. The crumble at the top? It's just for texture. Something to throw you off, as though to say, Ha! You thought I was going to suck. And you were soooo wrong.
Finally, I want to point out the serving tray, because it actually was my favorite part. You see, the three "plates" are all on hinges and actually fold up vertically. It's like an old-timey Transformer! I was at a photo shoot earlier in the day and the stylist's assistants kept saying, do it again! Do it again! Were they amazed that an antique could have moving parts? I'm not sure! But it delights me, too, assistants. I get it.
But really finally, aren't these pictures so gross and sad? The gray meeting room table with the overhead florescent light is SO DEPRESSING! So here's a super-modern cutting-edge high contrast photo. Just to leave a slightly less depressing taste in your mouth. Yay!

And now, I shall start planning for the bake-off 6 months from now, when I compete for FIRST PLACE! It's sort of like watching the Rocky series, but less punchy.

Tuesday, October 18, 2011

DIY Movies

Sometimes my friends amaze me. You see, I might sew a bag or knit a dinosaur, or perhaps grow a bucket of potatoes. But some of my friends--Tara Miele, in particular--make movies. Granted, there are probably some indie movies that were made in the same amount of time that it has taken me to knit some sweaters. But when I'm done with a sweater, I don't then take it around to festivals and win prizes, nor do I mass-produce it and sell it on Amazon, which is, incidentally, what is happening with Tara's movie The Lake Effect.

Here is what I love about the making of this movie--it has DIY roots. The producer of the movie, Jennifer Westin, sent out an email to some friends and colleagues that went something like this:

Subject: Want to make a feature this summer?
Dear friends,
I’m making a movie. It’s going to be ultra-low budget, shot in southwest Michigan this summer.
I’m looking for a writer and a director.
This is a creative experiment—what can we do with what we have?
Production plan: Director, DP and I travel to Michigan, live at my family’s house while we prep
for a few weeks. Bring in 2 actors to play the leads. HD, minimal lighting, minimal crew, short
shoot.
Limitations:
-No explosions or car crashes
-Has to be contemporary
-Action should be mostly contained to my family’s house and the surrounding beach and woods
Additional resources:
-1994 Ford Ranger, plum colored
-Kayaks
-Dog, cute, not really trained

Tara received this email through a friend of a friend. Four months pregnant at the time, she dusted off a pet project that mainstream Hollywood had deemed too "indie" and sent it off to Jennifer. Who loved it. And so they got to work, filming this full-length feature over 15 days just a few months later, and having Tara fly back to California just 3 days before Tara would be 37 weeks (literally too pregnant to fly).

And now, the movie is not just created, it is OUT THERE IN THE WORLD. Just this week, in fact, the movie won "best screenplay" at the Jacksonville Film Festival. And before that, they won "best feature" and "best director" at the Moondance Film Festival. And "best ensemble acting" and "best screenplay" in the Phoenix Film Festival. They are tearing it up!

But best of all, now any of us can watch this movie--it is now available for purchase at Amazon and you can rent it through Netflix. I, for one, already have it cued up and am so excited that it is now cleared to ship!

But the moral of the story is this: DIY can happen in many different ways, my friends. It doesn't have to involve glue or fabric or knitting needles. Seek out opportunities and don't be afraid to roll up your sleeves and get creative when funds are lacking. Budget schmudget, is what I say. And so does my friend Tara, who made a movie.

Friday, October 14, 2011

Dino Help!

Hi, I'm Ankylosaurus. I like plants, crawling, and hitting things with my big spiky tail.
Friends, I have to admit something. I have not been able to stop thinking about these Knitted Dinosaurs! Every time I see a photo of one I start thinking about how I want to make one. They're pretty small...how long could it take? Four hours? Five? That's just one big knitting evening really. Or...one train ride up to Rhinebeck for the Sheep and Wool Festival, which I happen to be going to this weekend. Hmm...knitting a dinosaur on the Amtrak train at 7am on a Sunday going to a knitting festival? Why that sounds great!

The problem is this. Which one do I knit!!!??? I need help. I love them all too too much. Here are a few of the ones that I can't stop thinking about. Will you please leave a comment and tell me which one to make? Thank you very much. 
Hey there, I'm T-Rex! I have a reputation for being pretty violent, but I actually have a heart of gold. I also have 60 teeth.

Hi guys, I'm Diplodocus. I like hugs.
I'm Plesiosaur! Just wanted to poke my head up out of the water to say hello. I'm really into seafood, and I love to dance. Just kidding, I swim.

Monday, October 10, 2011

On Self-Editing


I had a fabulous day last Friday. First, I didn't go to work, so there's that. Second, it was perfect weather...a lovely day for strolling, not too warm for boots. And so I woke up at the crack of noon and decided that I would go buy seeds, see if can't get a second wave of leafy greens going before winter really hits. (Sidenote: I have this vision of turning the whole yard into an amateur greenhouse this winter, somehow using 100 yards of plastic sheeting, a random collection of poles, and perhaps duct tape to build a leafy green cold frame. Will I do it? As of today, yes, I believe I will.)

I took a bunch of photos of my latest modern carpet bag on the way to the garden shop, and when I arrived, the owner of the shop and her cute little doggy greeted me with friendly hellos. As I looked over the seeds, searching for spinach, the shop owner said two unlikely words to me: I'm nervous.

Now, I sort of love it when a stranger takes down the fourth wall and creates a space in which to speak freely. How refreshing, I thought! A stranger is telling me she's nervous! Why, I asked? And she went on to tell me that she was making a flower arrangement for a DIY/crafty celebrity who shall remain nameless. (I mean, she told me the name, but I won't tell you the name because that would be uncouth.) There she was, this lovely flower shop owner--who, as far as I can tell, has really made a name for her shop--doubting herself. She led me back to where she was working, and I must say, it really was a gorgeous arrangement she was building. But I knew that no matter what I said, she was still going to wonder if she had picked the right flowers, was building to the right scale. If the small spray of green buds was too fussy, or if the dahlias weren't looking a bit wilted. I praised the arrangement and we had a nice chat, but the words I really wanted to say didn't hit me until I was several blocks away, and that is this: Honey, she chose YOU. Of all the flower shops in all of Brooklyn, this DIY tastemaker wants YOU to make her flower arrangement. Believe in yourself, because she believes in you. Go with your gut. Make the arrangement as though you were making it for yourself and it will surely be beautiful.

Or as Coach Taylor might put it: Clear eyes, full hearts, can't lose.

Later that day, I went to Brooklyn Charm and bought myself a charm necklace. (Happy b-day to me!) I had made these little charm necklaces for each of my bridesmaids when I got married, and just recently got to thinking, hello, why didn't I make one for me? And so I selected my charms--four in total: a wishbone, a feather, a hummingbird, and a heart--and had them all loaded up onto a chain. But when I walked out of the store and saw them all together around my neck, only then did I realize that, when worn together,  you can't make out a single one. It just looks like a tangled mess of luck and love, which, let's face it, may be a good metaphor for my life so far. But the overall effect? Not so pretty.

I started seeing a theme to the day: self-editing, it seems, is rather important.

When you are a creator, there are so many reasons that it is important to edit what you are making and so many ways that self-editing can go wrong! We doubt ourselves, we ignore trends, we make emotional decisions, we decide that more is better. But really, if we just take a step back and look at what we've created, the answer is often there. That four charms is probably too many, that the fabric may be a touch gauche, that ripping back to make it right is usually the right thing to do. That sometimes it's okay to abandon a project that isn't working. That putting your name on something that didn't turn out right is sometimes not the best idea, no matter how many hours you spent working on it. But to make things even more confusing, sometimes being a touch gauche is how you test your boundaries and explore creativity! Or sometimes a wonky seam adds a huge amount of charm! Oh, it's so exhausting sometimes, looking at what you've created and deciding if it is right, if it fits your vision, if it is enough (or not enough, or too much). But the truth of the matter is this: Fabulous is fabulous, and fabulous don't lie.

It's worth repeating: Clear eyes, full hearts, can't lose.

That night, I curled up on my couch and watched Project Runway. Amazingly, the theme of self-editing continued! The contestants were asked to make one look, then halfway through they were told they needed to make a second look. Then, just hours before the runway show, they were told that they had to pick only one of the two garments to show on the runway. Oh, how the contestants were torn!! But Tim Gunn's genius words almost made me gasp. In fact, I had to pause, rewind, and write down the following phrase on the back of a piece of junk mail:

"I don't think you should use the look you've invested the most time in. You should use the look that is the most outstanding."

Outstanding, yes, that's the word to keep in mind.

And so, for today's post, I decided that I would only select one image from my fabulous Friday to show to you all. Just a little exercise in my own self-editing--pick one photo out of 63 possible photos. Why did I pick this one? Well, first of all, because they show my boots. And I love my boots. Ok, but really, here's why: this photo shows the shape of the bag the best. The photo has movement. It is evocative, it paints a picture of what the day felt like, it has a mood. The sun, at that moment, was just beginning to move sideways. And even the sunspots, which are not ideal, remind me of exactly how that moment felt. And for those reasons, it was my favorite.

Tuesday, October 4, 2011

Monkey Face, 1951

Just a little note for today. Because I was just looking at these photos and was thinking about family. And about genes. About why my skin can get somewhat tan and has moles, but my sister is covered in freckles and burns with the sunrise. And yet we can both perfectly replicate that monkey face our Dad (shown at center) is making.

I've been wondering why I only had three wisdom teeth. And how my knees will most likely fail me in this lifetime (and my eyes, too, though they're still going strong). And how my face looks sleepy like my mom's in the morning.

I was thinking about my grandmother (shown below...she's the one in the back), and how fabulous I bet she was. How her face lights up. And how I secretly hope my face lights up, too, in that very same way. Though I have to admit that I've also caught myself mid-scowl, keys in hand, ready to go, done talking, not unlike my grandpa on the left.

While I spend most of my days staring at gorgeous handmade creations and excellent modern photography, I find that these photos--at least today--are more mysterious and enthralling. And sometimes, even though we have a million entertainments at our fingertips, it's most satisfying to ponder the stuff we're made of (a.k.a., our parents' biggest DIY projects of all.)