Thursday, March 10, 2011

Turbans with Elton John Sunglasses

Don't talk to me...I'm too hungover.
So I'm still making turbans. And I have to admit, my February turbans are kicking January's turbans' butts. Not to play favorites or anything...I would NEVER do that with craft projects. (OK, yeah, I totally would...especially because not everything I make is cute. What? It's not like they're my children!) 

I started out my turban headband exploration in January with knitting--worked in a long strip, the knitted turbans have ribbed edges that snugly fit your noggin. I tie the strip in a knot to make the classic turban silhouette, and then seam the edges together to put the whole thing in the round. Simple, cute, fun. I like it. 

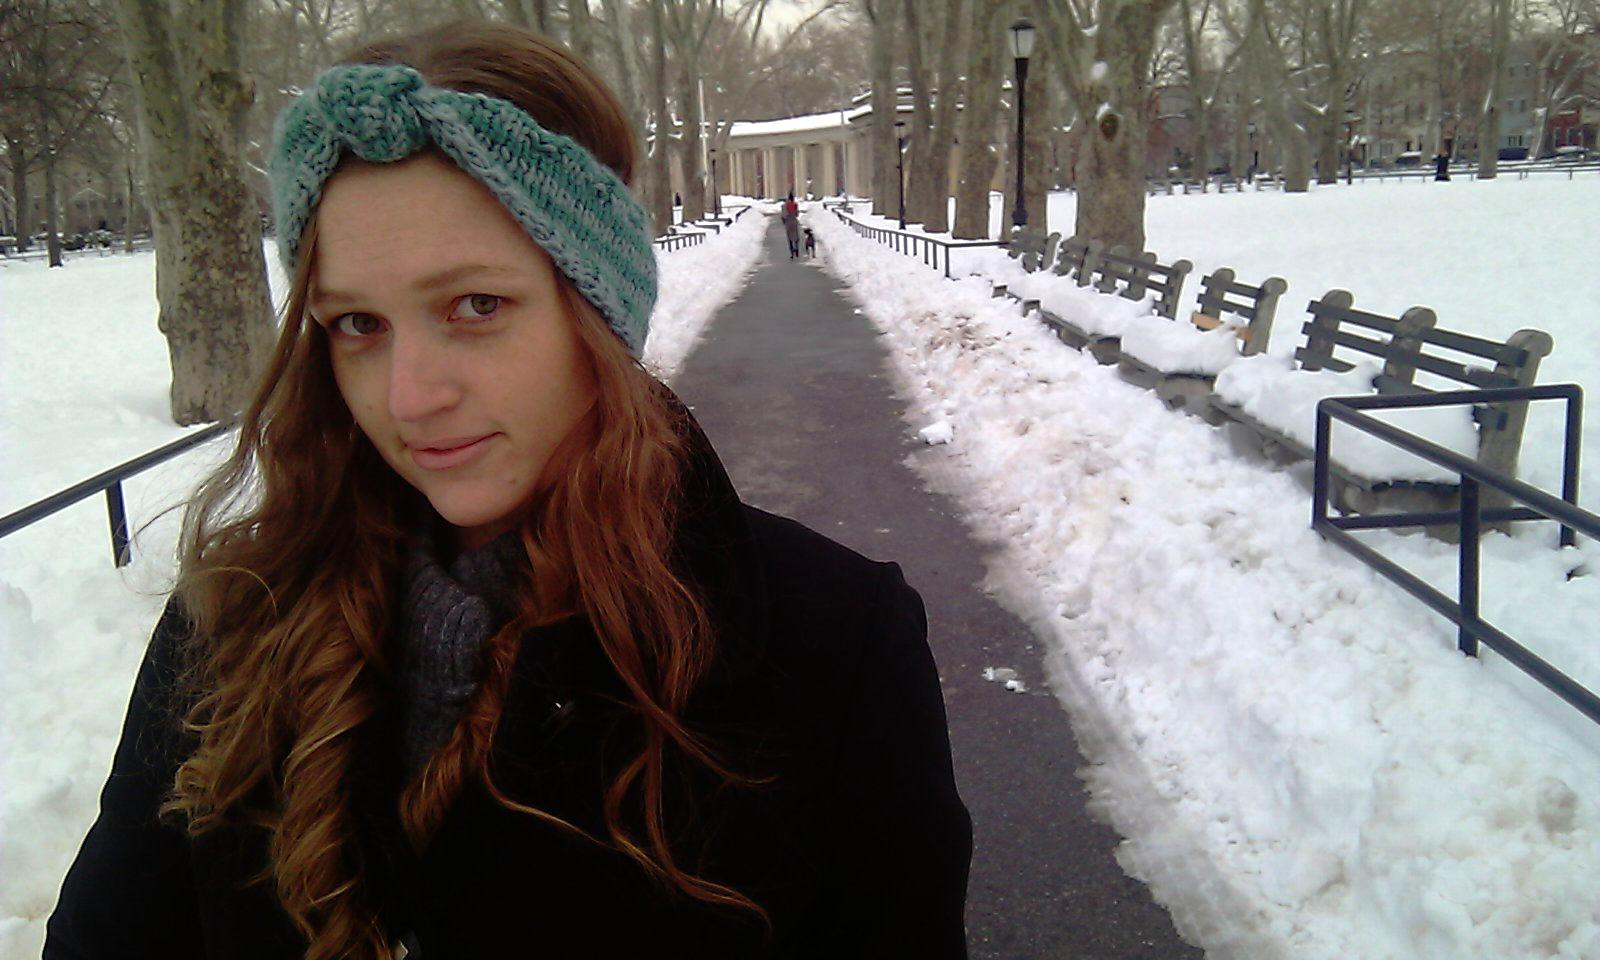
A knitted turban on a wintry day
But then last month, a coworker showed me her storebought turban she'd purchased years ago, never to find another one again. Desperate for a replacement (this thing had apparently been worn to death), she commissioned a new one from me. Though it was...crocheted! Something I know how to do but really don't do very often. Crochet produces a rather thick, textured fabric, and I always kind of prefer the look and feel of smooth knit stitches. But for a headband? Why the hell not! Crochet made perfect sense. So I whipped one up in a couple of hours and handed it off to my coworker, who was quite happy to now have two of her all-time favorite headband. And so I made more...one for my b-day gals, Julie and Nicole, and another went to Anna last week, and then my coworker ordered another, and I have been crocheting up a storm since then. Usually while watching Chopped All-Stars, sitting on my derriere at home.

These things have been flying out of my house so fast, in fact, that I haven't even had a chance to photograph them. So a couple mornings ago, I woke before work and decided to take some photos, OF MYSELF, like a total nerd, just so I can get these puppies listed on Etsy. What did I learn from this photoshoot? If you are over 30, you should never take a close-up photo of your face in full sunlight within the first hour of being awake. Or maybe ever. Which is why I pulled out the Elton John sunglasses, which blissfully cover approximately 70% of my face.
Goodbye Yellow Brick Road...
Needless to say, only one of the headband turbans made it up to Etsy, and the rest of the photos have been burned. These ones I found to be hilarious--good examples of how a turban headband can make you look like a glamorous hungover divorcee, or like a boho hippie begrudgingly watching the sunrise. The choice is yours! Though I do highly recommend large glasses and a slightly annoyed attitude. It helps the overall look.

All of that being said, if you want one of these amazing crocheted turbans--which I can make in any color of the rainbow--just write a comment or send me an email or something. It'll be a few days at least before I can muster up the courage to attempt another photo shoot, so if you "need" one now, we can make it happen. Promise!

Monday, March 7, 2011

Yuck or Yes

I am, in pretty much no way shape or form, a fashionista. But I do enjoy poking my head into the fashion world now and then, seeing whether wide leg or skinny jeans are "in" this second (trick question: they are both always in), or what fabulous dress Dior sent down the runway that I would never have occasion to wear. I also love looking at "on the street" style fashion reports, though I'm often disconcerted by the sameness of what people are wearing. In fact, a few times in my life,  I have outright decided to ignore a fashion trend altogether in protest of its overuse. (I'm looking at you pointy flats; pink pea coats; ponchos; jewel tones; snake skin anything; metallics.) But really, all of this fashion gawking just boils down to two words: yuck or yes.*

And so today, here are my offerings for you--neither of which fall into the "overworn" category--taken from New York Magazine's The Cut slideshow: The 29 Most Stylish People at Paris Fashion Week, Part 1.


Yuck, I would never wear this two-faced get-up in a million years.


Yes, I would wear this today. And possibly 5 years ago. And possibly 5 years into the future.

Well, that was brief, fun, and had pretty much nothing to do with knitting, craft, or DIY. But it did remind me to go home and dig out my suede leather coat with fringe that makes me feel like Ariel from Footloose!

*The author of this blog would like to restate that she is in no way a fashion expert. The opinions of "yuck" or "yes" stated here are personal opinions, and the author maintains the right to change said opinions at any time, including tomorrow (though, to be frank, that is unlikely).

Friday, March 4, 2011

Morgan's Banana and Eva's Carrot

This week, I have been told by zillions of people (or like seven people) that I should post the recipes I used for my Tiny Cakes. So, with pleasure, I have typed them up here for your enjoyment. Note that I'm giving measurements appropriate for Tiny Cakes--not a whole cake!  If you want a whole cake, you might have to do a little math. 
The first recipe is from Morgan, who baked this banana bread for me a few years back that blew my mind. For the record, I don't even really like bananas. They're like my 12th favorite fruit. So it says a lot that this has become a fave. I loved her banana bread so much that I asked her to bake it for me for my 30th birthday and smother it with chocolate. Which she did. In the photo to the left, she is attempting to hide my cake while she puts candles in it.


And here, I am feeding her cake. Happy b-day, me! I seem to recall that Robb was worried all of the cake would be gone by the end of the night, so he took a slice of cake and put it in the end table drawer in his living room. (Which, thankfully, we found the next day.)

The recipe comes from a book called Eat, Drink and Be Chinaberry. I've adapted the recipe to make 4 Tiny Cakes, but if you want to make more, just use your multiplication skills. (This is one-third of the original recipe):

The Ultimate Banana Bread! (Tiny Cakes Edition)
1/2 cup all-purpose flour
1/3 teaspoon baking soda
1/3 teaspoon baking powder
1 ripe banana, mashed
1 1/2 tablespoons butter, softened
1/3 cup sugar
1/3 of an egg (I suggest beating the egg then eyeballing a third)
3/4 tablespoon milk
1/3 teaspoon vanilla extract
pinch of salt
4 squares of chocolate

Combine dry ingredients. In a separate bowl, beat remaining ingredients until smooth; stir in flour mixture until well mixed. Pour into greased and floured ramekins. Bake at 350 degrees for 10 minutes, then place a chocolate square on top of each Tiny Cake. Bake for another 10 or 15 minutes, or until a toothpick comes out clean. Spread chocolate evenly over the top. Cool before eating if you want.

*******************************************
The next recipe comes from notorious Desperate Housewife Eva Longoria! The most recent issue of People Magazine fell into my hot little hands last week, and I came home and decided to give Eva's carrot cake recipe a whirl. If you don't know this, by the way, Eva owns restaurants and writes cookbooks. In fact, she has recently released a new cookbook called Eva's Kitchen. See the things you can learn in People Magazine?

I halved the recipe for Eva's carrot cake, which will make about 6 Tiny Cakes. Note that even a half recipe of the cream cheese frosting makes A LOT of frosting. All this week I have been eating the leftovers by the spoonful straight out of the fridge. I ain't too proud.


Mom's Carrot Cake (Tiny Cakes Edition)
1 cup all-purpose flour
1/2 tablespoon ground cinnamon
1 teaspoon baking powder
1/2 teaspoon baking soda
1/2 teaspoon salt
3/4 cup vegetable oil
1 cup sugar
2 large eggs, lightly beaten
1 1/2 cups peeled and grated carrots (about 2 or 3 carrots)

Preheat the oven to 350 degrees. Grease and flour 6 ramekins. In a medium bowl, sift together dry ingredients. Then in another bowl, beat oil and sugar. Add eggs and beat until well combined. Add the flour mixture and just stir until blended. Add carrots in small amounts, folding them in. Pour into the ramekins and bake until they're lightly browned on top and a toothpick comes out clean (about 25-30 minutes.) Cool in the ramekins for 5 minutes, then run a knife around the cakes to take them out. Cool them on racks, then frost with cream cheese frosting. You can top them with pecans if you want, but I didn't. 

Cream Cheese Frosting
8 oz cream cheese, at room temp
1 stick unsalted butter
1/2 lb powdered sugar (or less, if you don't want it too sweet)
1 or 2 teaspoons vanilla

Beat cream cheese and butter until fluffy. Add sugar, 1 cup at a time, blending between each addition. Mix in the vanilla and beat until very smooth, 3 to 5 minutes.

Tuesday, March 1, 2011

Tiny Cakes


I've been into Tiny Cakes lately. Not cupcakes, mind you...there's no muffin tin with paper liners happening in my household. I'm talking about Tiny Cakes. In fact, I'm so into them right now that I'm going to capitalize Tiny Cakes throughout this post.

So why am I making Tiny Cakes? The answer is easy. If I make a whole cake, we will eat a whole cake. And by "we" I mean me and Robb. On a Wednesday night. For no reason.

And what are Tiny Cakes? They are just like real cakes except that they are baked in tiny greased-and-floured ramekins.

And how did I start making Tiny Cakes? Well, it all begin two weeks ago with a single rotting banana. It was left over from our week of detoxing...both Robb and I were so sick of "whole foods" and "fruits" that the second the detox was over, any healthy food in our house was immediately ignored and went into various states of decay. (As a dear friend described our behavior after the detox, "commence retox.") I looked at this sad, brown banana and didn't think trash--I thought BANANA BREAD! I got out my friend Morgan's amazing recipe for the best banana bread ever and realized it called for three or four bananas and I only had one. That's fine by me, I thought...I'll just make a third of a recipe. Which was exactly what I did. I then poured the batter into four little greased-n-floured ramekins and baked them up. In the last ten minutes of baking, I put a little square of chocolate on each one, which got soft and gooey in the oven. I smoothed out the chocolate over the top and Robb and I ate them right out of the ramekin. Perfecto! And the best part was, we could only eat two Tiny Cakes a piece. Not an entire sheet cake (like we've been known to do.)


The following weekend, I decided to make Tiny Carrot Cake--Eva Longoria's carrot cake from People Magazine to be specific. Sounds kinda skanky, but it was so delicious!! I whipped up a half recipe, which was way more than enough. For this one, I decided  to remove the cakes from their ramekins and frost them on the sides with cream cheese frosting, too. I'm not a great froster (can you tell?) so my frosting is "impressionistic," only going about half way down the sides.
 
But really, isn't this a fun way keep yourself from eating an entire cake? Tiny Cakes!! I'm sure Eva will tweet about me and the trend will spread like wildfire throughout the tabloids.

Wednesday, February 23, 2011

Rusty Rims, Meet Coca-Cola

Fixin' brakes and stuff.
This last weekend was a crafty one. VERY crafty. Much craftier than usual, in fact. There was sugar-scrub making, late-night skirt sewing, broccoli roasting followed by banana-bread baking, there was turban crocheting, man-sweater knitting. And finally, there was bike maintenencing. A new realm for me! Tools and stuff!

I should probably explain.

So I'm working on a big DIY book right now. And I mean BIG. It covers pretty much every possible thing that you can do yourself. Wanna give yourself a beehive? Now you can. Care to create a terrarium? Why I'd love to. Want to make like 1000 crafts? Sure! One of the things that this book covers is how to do basic repairs on your bike. We had the photo shoot last week (see above!), and in order to get our how-to-fix-the-damn-bike shots, we pulled in a real life NYC bike messenger girl, and she was kind enough to demonstrate how to swap out brake pads, fix your flat, or lube your chain (to name a few).
Rusty rims.
Over lunch, I asked the kind bike messenger lady what she does if her rims get rusty. She said to me, definitively, "I've never had rusty rims." And boy did I feel like an a-hole. Cuz this here photo above is what my rims looked like after it had been chained up in front of my house all winter. (Please disregard toilet in background of photo.)

I'd read somewhere that rust can be removed with Coca-Cola. It's one of those thing you hear and you don't even know if it's true, like how Twinkies are supposed to be eternal or something. But who has the time (literally, in the case of a Twinkie) to find these things out? Well, apparently I do. I had a frank talk with myself this last weekend about how my bike was going to no longer be functional if I let the rusty rim situation get any worse. So I bought a liter of Coke (and a bottle of CLR in case the Coke theory failed) and set about my task. In the kitchen of course. Because that's where it's totally appropriate to do super messy gross sticky dirty work.
Wow!

This is how it went down: I first tried the Coca-Cola, scrubbing at my rims with an old toothbrush. It did, quite literally, nothing. I gave up and tried the same thing with the CLR. Again. Nothing! I then went online and learned the magic trick. Are you ready? Here it is: crumple up a piece of tin foil, dip it in the Coke, then scrub away at the rust. 

OMG. It was magic! Completely addictive. It was like being in a Sham-Wow Infomercial!

I'm sure like half of the people reading this already know this trick and are judging me for being so not-in-the-know (or are judging me for being so inappropriately excited about this...or are judging me for letting my rims get so rusty in the first place. OK, everyone is judging me at this point. Let's just move on.) Around the time I finished the worst spots on the back wheel, I also realized that winter is not yet over. Meaning, I have to put my bike back outside. So, I stopped where I was and decided I'm gonna really have at it with the Coke-and-foil on the first warm day of spring, when I can slop around outside and then actually take my shiny new wheels for a spin. Wheeeeeeee....! At any rate, if you've got a rusty mess on your hands like I did last weekend, you now know what to do.


*sparkle*

Wednesday, February 16, 2011

Men Need Bags, Too!


When I sold my HeyAllday Handmade tote bags at the In God We Trust holiday bazaar last December, I learned a few things: 1) people buy more when they drink, 2) long straps are appreciated, and 3) men need reusable grocery bags, too! That's right...I had several requests for tote bags that are suitable for men. So I got to thinking...what kind of bag would my dad feel okay toting? The answer: the man's camo bag.


I know! I'm being terribly sexist here. There are many men who would be perfectly happy with a solid color, or maybe, just maybe, a stripe, but as a challenge I decided I would design a bag as a Christmas present for the manliest man I know...my dad. And as an homage to his time spent as a marine in Vietnam, I chose a classic camouflage fabric. 


In case you were questioning my dad's toughness, here is a photo of him when he was in Vietnam. So tough!


And here is a photo of him taken last year at a Mud Run! See? Still tough! Clearly I had to make a bag to suit his standards. Just to be safe, I included a pocket knife with the bag, so if anyone were to taunt him for being girly, he could threaten their life. I also considered attaching Velcro to the outside of the small bag so that he could stick it to the dashboard of his car (my dad, after all, won't be carrying his stuffed bag in his purse.) But I decided to forgo the Velcro, figuring that it will just live on the passenger seat of his car, ready to roll next time he's at the store!


The Christmas gift went over with flying colors. In addition to the bag, he also received a knitted beard (shown just to the right of the bag). I guess I made it my mission this year to bridge the gap between crafty things and manly things. Let's call it father-daughter bonding!

But best of all was the cell phone photo I received from my dad last week: a camo tote bag packed with groceries on the trunk of his car, sitting next to a paper Trader Joe's bag. (Nice touch with the military man on the bag, dad! Very artistic!) Looks like I need to make him another one for the extra groceries.

So, if you know of a manly man who would like  a manly bag, let me know and I'll whip one up in a jiffy!

Friday, February 4, 2011

Turbans for All!


Around this time of year, I start to get really P.O.ed about winter. Snow? Gross! I hate you brown boots! Stupid pea coat, I am SO SICK of you! And, as a person who owns approximately 57 hats, I actually manage to get sick of every last one of them around this time of year. And that is why I decided to start making turbans. As you can see in the photo above, I may be depressed about the snowy conditions, but my pout is suddenly a bit more glamorous, and the blue of the turban is a bright spot against the bleak horizon. Right?

OK, I really got the idea to start making turban headbands because I saw a pretty girl in the 6th Avenue subway station who was rocking one in cream. I observed it while pressed up against other human beings in a heavily crowded stairwell, and I thought to myself...hmm...I could totally make that. When I got home, I pulled out my overflowing yarn bag and started to play with colors. I wanted to do stripes, and I wanted to burn through my stash.

The blue-and-green turban came first--knit in chunky wools, I had it done in about two hours. I pretty much just knit a big long strip. Then I tied it in a knot to turban-ize it, and then crocheted the ends together to form a circle. Whamo! You've been turbaned.
I then, of course, had to do a pink and red turban since we're coming up on Valentine's Day and all of that. Plus, doesn't everyone need a little pop of color in winter? In my opinion, it's crucial to our survival!

My two models here--Julie and Jess--were more than happy to put these puppies on their heads at a dinner party last weekend. I was curious to see how they would look on different hairstyles, and as you can tell, the answer is CUTE. I love the blue turban over Julie's swoosh of black bangs and with her glamoriffic red lips. Jess in the red headband is a vision of girliness, and her voluminous curls playfully envelop the headband. Yay!

Once my turbans passed the "must look good on many heads" test, I posted them on my Etsy shop: HeyAllday Handmade. That's right, you can buy your very own! Then we can all get through winter together...turban style.